
How To Test Ethernet Cable With Multimeter
In networking, the integrity of your Ethernet cables is paramount. A well-functioning cable ensures that data packets travel seamlessly and efficiently, guaranteeing optimal performance of your network.
However, there are instances where specialized Ethernet cable testers might be unavailable. In such cases, a multimeter, a versatile tool often used by electricians and network technicians alike, can be rescued.
This article guides you through testing an Ethernet cable using a multimeter.
What is Ethernet Cable Testing?
Ethernet cable testing is essential to ascertain the operational integrity of a cable. It involves checking for breaks, poor connections, or other issues that could hamper a network’s performance.
A faulty Ethernet cable can lead to slow data transfer speeds, intermittent connections, or total network failures. Hence, ensuring that your Ethernet cables are in optimal working condition is not just necessary but critical.
Tools Required to Test an Ethernet Cable
The alligator clamps and sewing needles will facilitate efficient and accurate testing, ensuring precise readings from the multimeter.
How To Test Ethernet Cable With Multimeter
The multimeter is set up by selecting the ohm meter and diode checker functions and connecting it to the Ethernet cable with alligator clamps and sewing needles. Each wire is tested for continuity, with the readings confirming the cable’s integrity for efficient data transmission.
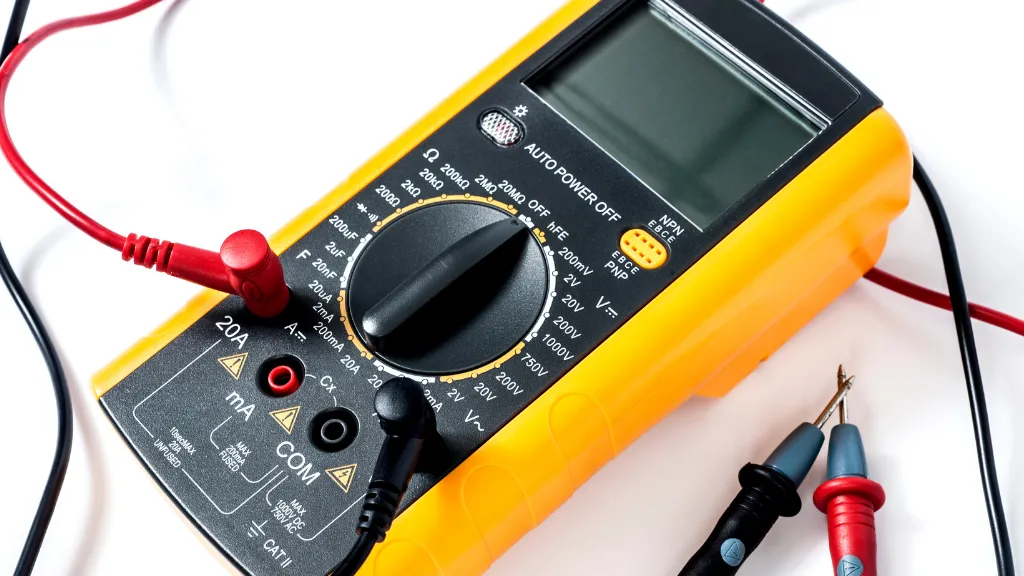
Step 1: Set Up the Multimeter
The multimeter has various functions to measure different electrical properties, including voltage, current, and resistance. For Ethernet cable testing, the focus is on checking the continuity of the wires within the cable.
Thus, the ohm meter function, often represented by the symbol “Ω,” is selected. This function measures resistance, and in the context of cable testing, it helps ascertain whether there is a continuous path for electricity to flow, indicating no breaks or faults in the individual wires.
Additionally, the diode checker function can be instrumental. It measures resistance and emits a beeping sound when it detects continuity, confirming that the tested wire is in good condition.
Insert the red probe into the port on the multimeter labeled “Ω, V, or +” and the black probe into the port labeled “COM or -.” Ensure the probes are securely inserted to avoid disconnections during testing.
Step 2: Connect the Multimeter to the Ethernet Cable
Lay the Ethernet cable on a flat surface and untangle it if necessary to ensure both ends are accessible. Identify the RJ45 connectors, the small, rectangular ends that plug into a computer, switch, or other network devices.
Attach the alligator clamps to the sewing needles. Ensure the connection is tight and secure to avoid any slippage or disconnection during testing.
Now acting as extensions of the multimeter lead, the sewing needles will allow for a more precise connection to the wires within the RJ45 connectors.
Step 3: Test for Continuity
Turn on the multimeter and set it to the continuity test mode. In this mode, the multimeter sends a small current through the circuit being tested. If there’s continuity (a complete circuit), the multimeter typically emits a beep to indicate that electricity can flow from one end to the other without interruption.
Insert the sewing needles into the front of the RJ45 connectors to touch each pin. Start with pin 1 on one end of the cable and the corresponding pin 1 on the other end.
If the multimeter beeps, it indicates continuity, meaning the wire is intact. If there’s no beep, it suggests a break or fault in the wire.
Document the results of each wire tested. A systematic approach ensures that no wire is overlooked, making the evaluation process (which comes after the testing) more straightforward.
Step 4: Evaluate the Results
The first aspect to evaluate is the continuity test results. Each wire within the Ethernet cable is tested for continuity to ensure no breaks or disconnections.
During this test, a consistent beeping sound from the multimeter indicates electricity flowing through the cable uninterrupted, signifying good continuity.
- Positive Outcome: If all wires exhibit good continuity, it confirms the cable’s integrity.
- Negative Outcome: Any wire lacking continuity indicates a break or fault in that specific wire, necessitating further inspection.
RJ-45 Ethernet Cable Pinout
Understanding the Basics of RJ-45 Ethernet Cable
The RJ-45 Ethernet cable is a common and essential component in wired networking. It connects hardware devices in a local area network (LAN), such as computers, routers, and switches.
Understanding its pinout is crucial for network setup and troubleshooting.
The Standard Pin Configuration
- Pins 1 and 2 (Transmitting Data): These pins transmit data. Pin 1 is often white and green in a standard Ethernet cable, while Pin 2 is green.
- Pins 3 and 6 (Receiving Data): These are used for receiving data. Pin 3 typically has a white and orange color, and Pin 6 is orange.
- Pins 4 and 5 (Unused in Standard Ethernet): These pins are not used for data transmission in most Ethernet cables. They are usually blue and white/blue.
- Pins 7 and 8 (Unused in Standard Ethernet): Similar to pins 4 and 5, these are generally unused in standard Ethernet setups. They are commonly brown and white/brown.
Two Common Standards: T568A and T568B
Ethernet cables follow two standard pinout arrangements: T568A and T568B. Both have the same functionality, but the order of the colored wires differs.
- T568A Configuration: This arrangement starts with green and white/green on pins 1 and 2, respectively.
- T568B Configuration: It begins with orange and white/orange on pins 1 and 2.
The choice between T568A and T568B is often based on regional preferences or specific network requirements.
Crossover and Straight-Through Cables
- Straight-Through Cables: These connect devices, like a computer, to a switch. Here, both ends of the cable follow the same pinout configuration.
- Crossover Cables: Connect similar devices, like two computers, directly. In this case, one cable end follows the T568A configuration, and the other follows the T568B.
Ethernet Cable Wiring
| Pin Number | T568A | T568B |
|---|---|---|
| 1 | Green+White | Orange+White |
| 2 | Green | Orange |
| 3 | Orange+White | Green+White |
| 4 | Blue | Blue |
| 5 | Blue+White | Blue+White |
| 6 | Orange | Green |
| 7 | Brown+White | Brown+White |
| 8 | Brown | Brown |
What can I do with the old Ethernet cable?
Though seemingly outdated or redundant, old Ethernet cables can still be put to various uses. Here are some creative and practical ways to repurpose them:
1. DIY Projects:
- Crafts: Use the colorful wires inside the Ethernet cables for art and craft projects.
- Jewelry: Make unique bracelets, necklaces, or other jewelry items.
2. Organizational Tools:
- Cable Organizers: Use the outer casing to organize and bundle other cables.
- Garden Ties: They can be used to support plants in the garden.
3. Technical Uses:
- Patch Cables: Cut and terminate them to create custom-length patch cables.
- Temporary Networking: Keep them for temporary networking needs or testing purposes.
4. Educational Purposes:
- Learning Tool: Use them to teach kids or students about networking and wiring.
- Experimentation: Experiment with different types of connections and networks.
5. Recycling:
- E-Waste Recycling: Take them to an e-waste recycling center where they can be processed and the materials reused.
- Metal Recovery: Extract the copper wiring to be sold or recycled.
6. Donation:
- Schools and Non-Profits: Donate them to organizations, schools, or community centers that might still use them.
- Developing Countries: Some regions still need older technology.
7. Networking Equipment:
- Routers and Switches: Use them with older routers and switches that don’t require the latest Ethernet standards.
- Legacy Devices: Connect legacy devices that are still in operation.
8. Home Projects:
- Hanging Tools: Use them to hang lightweight tools or other items in a garage or workspace.
- Child’s Play: Let children use them for imaginative play or learning about electronics safely.
9. Emergency Repairs:
- Temporary Fixes: Use the copper wires for temporary electrical repairs or connections.
- Soldering Practice: Practice your soldering skills on the old cables.
10. Creative Art:
- Wall Art: Create unique wall art or sculptures.
- Decorations: Use them in decorative projects for a techy touch.
Precautions:
While repurposing, ensure that you are handling the cables safely, especially if you are extracting the internal wires or using them for electrical connections. Always consider the safety guidelines to avoid any hazards.
Will Ethernet cable become obsolete?
Ethernet cables still provide reliability, security, and speed that is sometimes superior to wireless connections. In environments where data integrity, security, and speed are paramount, such as in corporate offices, data centers, and gaming, Ethernet remains a preferred choice.
Ethernet technology isn’t static; it continues to evolve. With the development of higher-category Ethernet cables that support increased data speeds and bandwidth, Ethernet can adapt to modern technology and data consumption demands.
The development of technologies like Li-Fi (Light Fidelity), which uses light to transmit data, could impact the use of Ethernet cables. However, these technologies are still in the nascent stages and have their own sets of challenges and limitations.
Conclusion
Testing an Ethernet cable with a multimeter is a straightforward yet effective process. It ensures that your cables are functioning optimally, guaranteeing the seamless transfer of data packets and the overall performance of your network.
Armed with a multimeter and this guide, you’re well-equipped to diagnose and fix any Ethernet cable issues, ensuring your network remains up and running efficiently.
Frequently Asked Questions
Can I use a multimeter to test all types of Ethernet cables?
Yes, a multimeter is versatile and can test various types of Ethernet cables for continuity and configuration.
What are the safety precautions when testing Ethernet cables with a multimeter?
Always ensure the multimeter is in good condition, and avoid testing on live networks to prevent any electrical hazards.
How do I fix an Ethernet cable that fails the multimeter test?
Identify the specific issue, whether it’s a break in the cable or a wiring configuration error, and take appropriate measures to fix it, including re-crimping the connectors or replacing the cable.
With these insights, you’re equipped with the knowledge to test Ethernet cables with a multimeter and empowered to ensure your network’s robust performance, ensuring data flows seamlessly and efficiently at all times.

Author
Alex Klein is an electrical engineer with more than 15 years of expertise. He is the host of the Electro University YouTube channel, which has thousands of subscribers.