
How To Test A Laptop Charger With A Multimeter
In a world where laptops have become essential for work, education, and personal projects, ensuring that your device is charged and ready for use is paramount. However, there are instances where you find your laptop not charging, and before you panic or rush to a technician, it’s crucial to ascertain if your laptop charger is working as it should.
This article will guide you through the simple yet effective testing of your laptop charger with a multimeter.
What is a Laptop Charger?
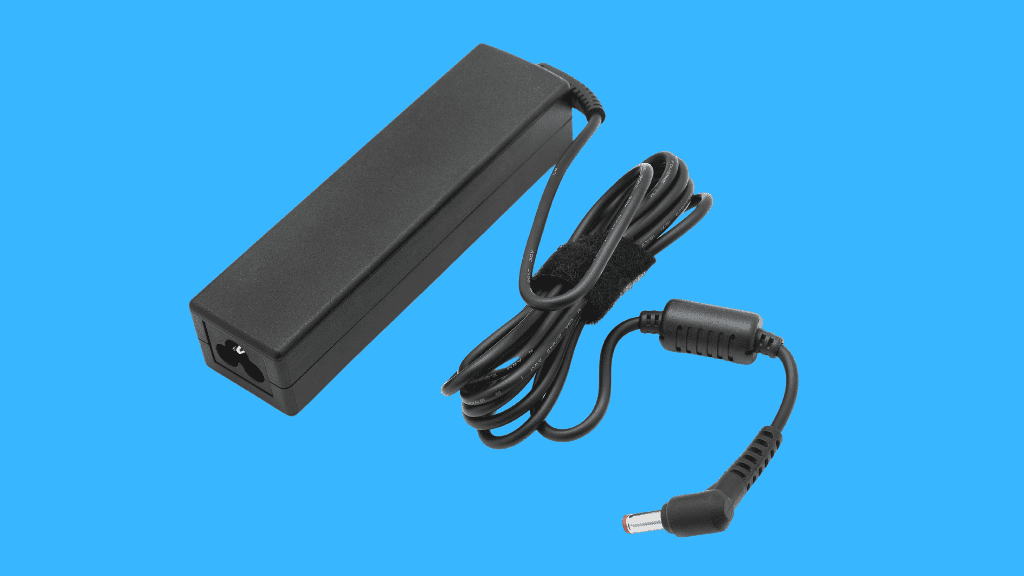
A laptop charger, also known as a power adapter, power cable, or charger cord, is a device that converts electricity from a standard power outlet into a compatible form of power that your laptop can use.
It’s the bridge between the wall outlet and your laptop’s battery, ensuring that your device gets the right amount of power in the right form.
Why Test a Laptop Charger?
Imagine a scenario where you have a looming deadline, and suddenly, your laptop isn’t charging. The first step in the diagnostic process is to check if the charger is working.
By confirming the functionality of your charger, you can either rule it out as a problem or identify it as the culprit, saving you time and possibly some expenses on unnecessary repairs or replacements.
Tools Needed
You would need the following tools to diagnose your laptop charger problems:
Ensure your multimeter is in good condition, with the proper leads and display screen.
How To Test A Laptop Charger With A Multimeter
Users must first understand their charger’s specifications and set up their multimeter accordingly. They then test the charger by measuring the voltage output with the multimeter and evaluate the results to determine if the charger is working properly or is faulty.
Step 1: Understand Your Charger’s Specifications
Before testing, you must know your charger’s voltage and current ratings. These specifications are usually printed on the charger and are crucial for accurately setting up your multimeter.
Understanding these numbers and symbols will ensure a successful testing process.
Step 2: Set Up Your Multimeter
Setting up the multimeter is crucial to ensure accurate readings and safety during testing. Here’s a detailed breakdown of this step:
Insert the Leads
- Black Lead: Insert the black lead into the multimeter’s COM (common) port. This port is typically labeled “COM” and is used for all measurements.
- Red Lead: Insert the red lead into the V (voltage) port. Ensure it’s the correct port, as some multimeters have separate ports for measuring different quantities.
Testing Multimeter Functionality
- Select Continuity Test: Turn the multimeter dial to the continuity setting, which is often represented by a diode or sound wave symbol.
- Range Selection: If your multimeter has a range button, select the low ohm measurement for continuity. This setting helps in checking if the multimeter is working correctly.
- Perform the Test: Touch the probes together. A functioning multimeter will emit an audible beep, and the screen will display a very low reading, indicating a closed circuit.
Checking the Probes
- Inspect the Probes: Ensure that the probes are not damaged and are clean for accurate readings.
- Test on Higher Range: Switch to a higher ohm range and repeat the continuity test. You may not hear a beep, but the reading should be close to zero, confirming the multimeter’s functionality.
Safety Precautions
- Handle with Care: Always handle the multimeter carefully, ensuring your hands are dry and you are not in contact with any conductive surfaces to avoid electrical shocks.
- Read the Manual: Always refer to the multimeter’s manual to understand its specific functionalities and safety guidelines.
With the multimeter set up correctly, you’re now ready to test the laptop charger’s voltage, ensuring it delivers the required power to the laptop. Always turn off and unplug the charger when not testing to ensure safety.
Step 3: Test the Charger’s Input Voltage
Evaluating the charger’s input voltage is critical in determining your laptop charger’s overall health and functionality. This step ensures that the charger receives the correct voltage from the power outlet before transforming this power into a usable form for your laptop.
Disconnect the Power Cord
Start by unplugging the power cord from the transformer, ensuring the charger is isolated and ready for testing. This separation allows for a focused and accurate assessment of the input voltage without interference from other components.
Plug the Charger into a Power Outlet
Insert the charger into a power outlet. Ensure the outlet is functional and typically used to avoid reading inconsistencies due to faulty wiring or other electrical issues in unused outlets.
Prepare the Multimeter
With the multimeter set to AC voltage, ensure the voltage range is appropriately set to accommodate the expected input voltage, typically around 120V or 240V, depending on your location.
Insert the Probes
Carefully insert the multimeter probes into the female connector of the power cord. Ensure that the probes are firmly in place to get an accurate reading. The red probe should be inserted into the live hole, and the black probe into the neutral hole of the connector.
Read the Multimeter
Observe the reading on the multimeter. A healthy charger should display a reading close to your region’s standard voltage supply. For instance, if you are in North America, a reading close to 120V is expected, while in many European countries, a reading around 240V is the norm.
Interpret the Reading
- Within Range: If the reading is within the expected range, the charger receives the correct input voltage, and the issue (if any) might be elsewhere.
- Significant Deviation: A significant deviation from the expected range indicates a problem with the outlet’s power cord or supply. It necessitates further inspection or replacement of the cord or an evaluation of the outlet and overall home wiring.
Safety Precautions
Always ensure that you are handling the multimeter with dry hands and are not in direct contact with the power outlet or the probes to avoid any risk of electric shock. Safety should be the utmost priority during this process.
By meticulously following these steps, you’ll be able to accurately assess the input voltage of your laptop charger, enabling you to identify and resolve any underlying issues affecting your laptop’s power supply.
Step 4: Test the Charger’s Output Voltage
In this critical step, you evaluate the charger’s output voltage to ensure it delivers the required 19V to power the laptop effectively. First, ensure the power cord is connected to the transformer and the charger is plugged into a power outlet.
Adjust your multimeter to the DC voltage setting, calibrating it to a range above 19V for an accurate reading.
Carefully insert the red probe into the metal pin inside the charger’s adapter. The black probe should be connected to the outer metal body of the adapter, ensuring a complete circuit for an accurate reading.
The multimeter should display a reading close to 19V, the standard output voltage for many laptop chargers.
If the reading aligns closely with 19V, the charger is in good working condition, effectively converting AC input voltage to the required DC output. However, a significant deviation from the 19V mark indicates a malfunctioning charger, necessitating further inspection or replacement to ensure the laptop receives the appropriate power supply.
Always ensure the probes are securely placed for a stable and accurate reading during this testing phase.
Step 5: Evaluate the Results
If the multimeter displays a reading close to the charger’s voltage rating, it indicates it is in good working condition. If the reading is significantly off or zero, the charger is likely faulty. In such a case, consider replacing the charger or seeking professional help.
https://www.youtube.com/watch?v=SW5c5b7b6AY
Why is it that sometimes a laptop charger heats up, and is it a sign of a potential problem?
It’s not uncommon for laptop chargers to heat up during use. This heating is often due to converting electrical energy from the wall outlet into a form that the laptop can use. During this energy conversion process, some energy is lost in heat, leading to the charger warming up.
However, if the charger becomes excessively hot, it could indicate an underlying issue, such as an internal fault in the charger, incorrect voltage setting, or problems with the laptop’s battery drawing too much power.
In such cases, it’s advisable to unplug the charger, let it cool down, and consider getting it checked to prevent potential damage or hazards.
Can a laptop charger affect the laptop’s performance, and if so, how?
Yes, a laptop charger can indeed impact the laptop’s performance. A charger not supplying the correct voltage or current can lead to issues such as slow performance, unexpected shutdowns, or the battery not charging properly.
The laptop relies on a consistent and appropriate power supply to operate optimally. If the charger is fixed, the power supply can be consistent, leading to fluctuations in performance. For instance, a lower voltage supply can result in the laptop slowing down to conserve energy, while a higher voltage can cause overheating and potential damage to the internal components.
It’s always advisable to use the manufacturer’s recommended charger and to regularly check and maintain both the charger and the laptop to ensure optimal performance.
Conclusion
Testing a laptop charger with a multimeter is a straightforward yet invaluable skill, especially for individuals reliant on their laptops for various tasks. It not only aids in quick diagnostics but also in making informed decisions on whether a replacement or repair is needed.
Frequently Asked Questions
How do I know the voltage rating of my charger?
The voltage rating is usually printed on the charger.
Is it safe to test my laptop charger with a multimeter at home?
Yes, testing your laptop charger with a multimeter at home is generally safe, provided you follow the correct procedures and safety precautions. Ensure that you understand the multimeter’s user manual and know the basic principles of handling electrical devices to prevent any risks of electric shock or damage to your charger or multimeter.

Author
Alex Klein is an electrical engineer with more than 15 years of expertise. He is the host of the Electro University YouTube channel, which has thousands of subscribers.