
How To Check For Continuity With A Multimeter
In the vast world of electronics and electrical systems, ensuring the integrity of connections is paramount. One fundamental aspect of this is checking for continuity. Continuity, in simple terms, verifies that electricity can flow through a circuit without any interruptions.
This article will guide you through checking for continuity using a multimeter, a versatile tool that should be in every electrician’s toolkit.
What is Continuity?
Continuity is the uninterrupted path for electrical current in a circuit. For a device to function correctly, there must be no breaks in this path.
Think of it like a water pipe: to flow from one end to the other, it must be intact without any leaks. Similarly, the circuit must be continuous without any breaks for electricity to flow.
Why Use a Multimeter for Continuity Testing?
A multimeter is a multi-functional tool that measures voltage, current, resistance, and continuity. Its versatility makes it an invaluable tool for electricians and DIY enthusiasts alike.
When checking for continuity, a multimeter is precise, reliable, and easy to use, making it the preferred choice for many.
How To Check For Continuity With A Multimeter
To check for continuity using a multimeter, ensure the device is in good working condition and set it to continuity mode. After testing the multimeter by touching the probes together, test the desired circuit by placing the probes on specific points, listening for a beep, or checking the reading to determine continuity.
Step 1: Prepare Your Multimeter
Before you start, ensure that your multimeter is in good working condition. Check its battery and ensure the display is clear. Next, insert the red and black probes into their respective ports on the multimeter, usually labeled with “+” and “-.”
Step 2: Set the Multimeter to Continuity Mode
Turn the multimeter’s dial or use its buttons to navigate to the continuity symbol. Ensure that the display or screen indicates that you’re in continuity mode.
Some advanced multimeters might have additional settings within the continuity mode, like a threshold for resistance that will trigger the beep. Ensure it’s set to a standard value below a few ohms.
Step 3: Test the Multimeter
Before testing any circuit or component, verifying that your multimeter is functioning correctly is essential. This step, often overlooked, ensures that any readings you obtain during your tests are accurate and not due to a malfunctioning tool.
To test the multimeter, touch the red and black probes together. When they make contact, the multimeter should emit a continuous beep, signaling a direct path for electricity to flow between the probes, indicating continuity.
If you don’t hear this beep, there might be an issue with the multimeter or its probes. It could be as simple as a weak or dead battery or indicate a more significant problem with the device. Always ensure your multimeter passes this initial test to guarantee the reliability of subsequent readings.
Step 4: Check Continuity in a Circuit
When checking continuity within a circuit, it’s essential to approach the process with precision and care. Begin by ensuring the circuit you’re about to test is entirely powered off. This step is not just a recommendation but a crucial safety measure.
Disconnecting the circuit from any power source eliminates the risk of electrical shocks and potential damage to the multimeter.
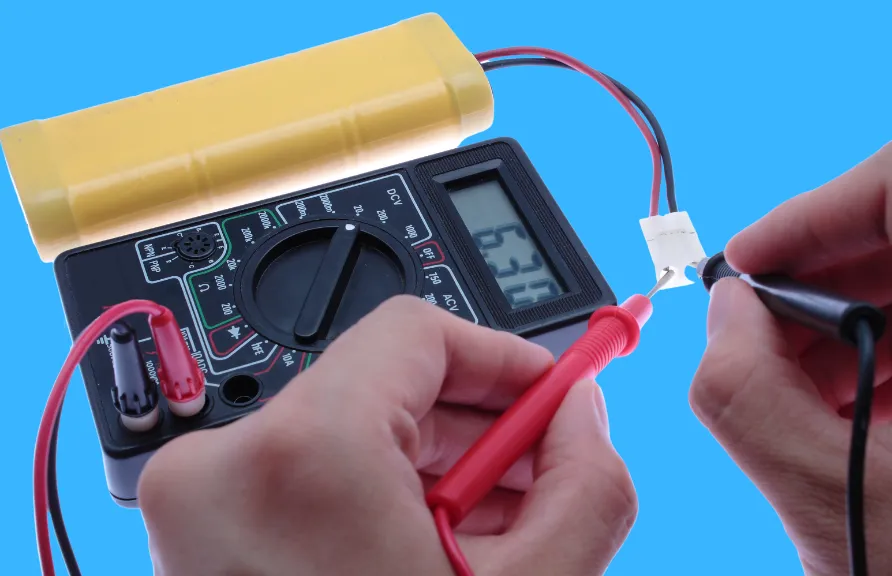
Once you’ve ensured safety, place the multimeter probes on the specific points or ends of the component in the circuit you wish to test. For instance, if you’re testing a wire, place one probe at each end of the wire.
The probes would go on the terminals if you’re examining a switch. When the probes make contact, listen for the multimeter’s beep.
A continuous beep indicates a clear path for electricity, meaning there’s good continuity. On the other hand, the absence of a beep suggests a potential break or fault in that part of the circuit.
It’s also worth noting that while the beep is a quick indicator, some multimeters also provide a resistance reading. In continuity, a reading close to zero ohms indicates a continuous path, while a high or infinite reading suggests a break.
During this process, the probes maintain good contact with the test points. Sometimes, a lack of beep might be due to the probes not making proper contact rather than a fault in the circuit.
If in doubt, reposition the probes and test again. This meticulous approach ensures accurate results and helps effectively diagnose any circuit issues.
Step 5: Interpret the Results
When you conduct a continuity test using a multimeter, the results are pivotal in determining the integrity of the circuit in question. If your multimeter emits a beep or shows a reading close to zero ohms, it indicates good continuity.
This means the electrical current can flow freely through the circuit without obstructions.
On the other hand, if a beep is absent or the multimeter displays an infinite reading, it suggests a break or interruption in the circuit. Such breaks can be attributed to various factors.
It could be a blown fuse, a wire that has snapped, a solder joint that has come loose, or even a malfunctioning component within the circuit. In some cases, the issue might be as simple as a switch being in the off position, interrupting the current flow.
It’s also worth noting that while a beep typically indicates good continuity, it doesn’t necessarily mean the circuit is functioning optimally. For instance, a wire might be frayed but still provide enough connection for the multimeter to detect continuity.
However, such a connection might need to be more robust for the circuit to function under regular conditions. Therefore, it’s essential to visually inspect the circuit and components, especially if the continuity test results seem inconsistent with the circuit’s performance.
Additional Tips for Continuity Testing
Always prioritize safety. Ensure circuits are powered off before testing.
Ensure your multimeter is in the correct mode to avoid damaging it or getting incorrect readings.
Regularly test your multimeter to ensure it’s working correctly.
Conclusion
Checking for continuity is a fundamental aspect of ensuring the safety and functionality of electrical circuits. With a multimeter in hand and the steps outlined in this guide, you’re well-equipped to tackle any continuity-related challenges that come your way.
Frequently Asked Questions
How can I tell if my multimeter is accurate?
Testing and comparing results with known values or another multimeter can help.
What does it mean if there’s no beep during a continuity test? It indicates a lack of continuity, suggesting a break in the circuit.
Can I test continuity on a live circuit?
No, always turn off and disconnect the circuit from any power source before testing.

Author
Alex Klein is an electrical engineer with more than 15 years of expertise. He is the host of the Electro University YouTube channel, which has thousands of subscribers.