
How to Charge a Capacitor Without a Resistor: A Comprehensive Guide
Capacitors play a crucial role in electronic circuits, storing and releasing electrical energy as needed. While resistors often control the charging process, alternative methods exist to charge a capacitor without one.
This article explores these methods, ensuring safety and efficiency in the process.
Understanding the Basics
Various factors can influence capacitors to store electrical energy in an electric field and their charging rate. While resistors commonly manage this rate, certain scenarios call for alternative methods.
These can be particularly useful in low-voltage systems or when rapid charging is required.
Using an Inductor
An inductor can be an effective alternative to a resistor for charging a capacitor. By connecting a diode in series with the inductor, the capacitor can be charged to a higher voltage than the source.
This method ensures that the capacitor is disengaged from the source at the optimal moment, preventing overcharging and enhancing efficiency.
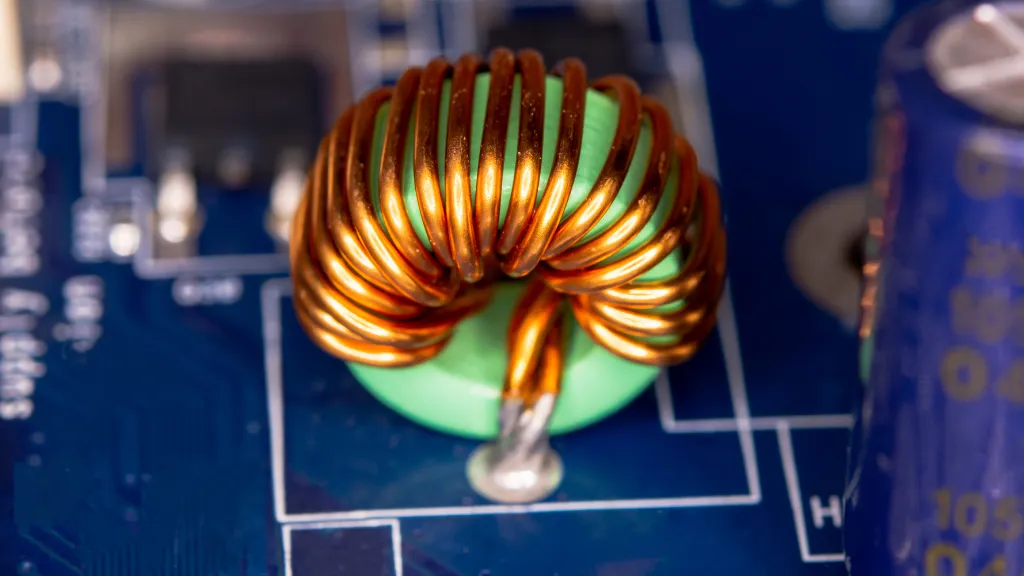
How to Charge a Capacitor With an Inductor
Capacitors and inductors can work in harmony to facilitate efficient energy transfer. When a capacitor is charged using an inductor, it can reach a higher voltage than the source, thanks to its ability to create a magnetic field that opposes the change in current.
This process is efficient and offers a level of control akin to a resistor’s.
Step 1: Gather the Necessary Components
- A capacitor
- An inductor
- A diode
- A voltage source (like a 9V battery)
- An oscilloscope
Step 2: Establish the Connection
Connect the capacitor to the voltage source. For instance, if you are using a 9V battery, connect a 100uF capacitor to it. Ensure the connections are secure to prevent any disconnections during the charging process.
Step 3: Integrate the Inductor
Place the inductor between the positive terminal of the battery and one terminal of the capacitor. The inductor is a bridge, facilitating the current flow and controlling it to prevent overcharging.
Step 4: Incorporate the Diode
Connect a diode in series with the inductor. The diode is crucial in directing the current flow and disengaging the capacitor from the source at the optimal moment. This precision ensures that the capacitor is charged efficiently without the risk of overcharging.
Step 5: Monitor the Process
Attach the oscilloscope to observe the voltage of the capacitor. Apply discrete frequencies through the inductor and monitor the changes in voltage. The oscilloscope will provide real-time data, allowing you to observe the charging process in detail.
Step 6: Analyze the Data
Use the data from the oscilloscope to analyze the charging process. Pay attention to the voltage peaks and how quickly the capacitor charges. This information is invaluable in understanding the inductor’s and diode’s efficiency in the charging process.
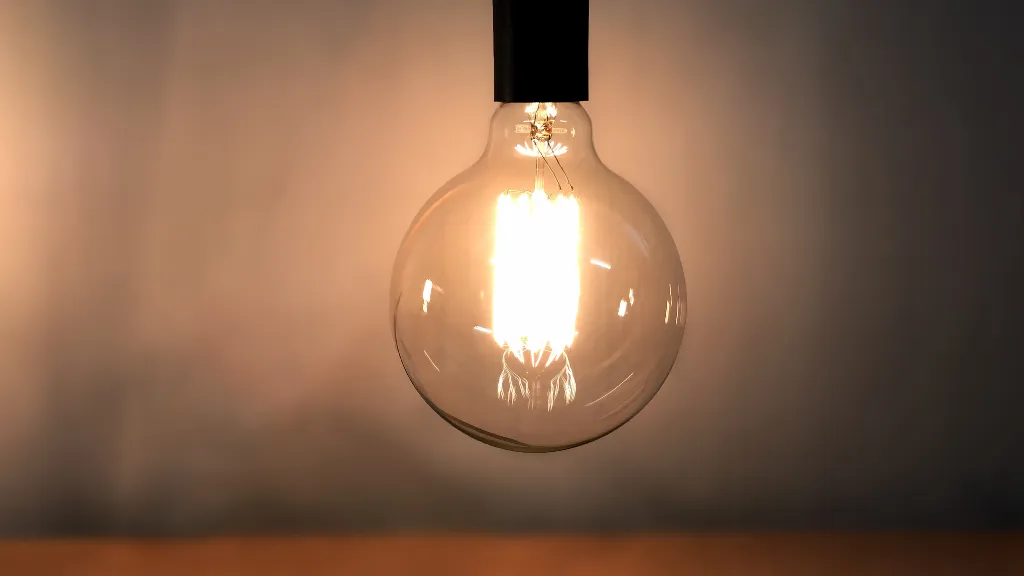
How to Charge a Capacitor With a Light Bulb
Charging a capacitor with a light bulb might seem unconventional, yet it is an effective and visual method that offers real-time insights into the charging process. The light bulb facilitates the charging and indicates the capacitor’s charging status.
The light bulb’s intensity changes as the energy is transferred, providing a visual cue of the ongoing process.
Materials Needed
- A capacitor
- A light bulb
- A battery (with a voltage rating compatible with the capacitor)
- Connecting wires
- A light bulb socket (optional)
Step 1: Gather Your Materials
Ensure that all the materials are at hand. The capacitor should be discharged to avoid any electrical hazards. The battery’s voltage should align with the capacitor’s voltage rating to prevent overcharging or undercharging.
Step 2: Initial Connection
Connect one end of a wire to the positive terminal of the battery. Attach the other end to one of the terminals of the capacitor. This forms the initial connection, initiating the charging circuit.
Step 3: Integrate the Light Bulb
Connect another wire from the unconnected terminal of the capacitor to one terminal of the light bulb or the light bulb socket. This integration is crucial as the light bulb will facilitate the charging process and indicate the capacitor’s charging status.
Step 4: Complete the Circuit
Attach another wire from the unconnected terminal of the light bulb or light bulb socket back to the battery’s negative terminal. This completes the circuit, and the light bulb should illuminate, indicating that the charging process has begun.
Step 5: Observe the Light Bulb
As the capacitor charges, pay attention to the light bulb’s intensity. It will initially glow brightly and gradually fade as the capacitor accumulates charge. This visual cue is invaluable for monitoring the charging process in real time.
Step 6: Capacitor Fully Charged
The light bulb will eventually turn off, indicating that the capacitor is fully charged. At this point, the energy stored in the capacitor is at its maximum, and the charging process is complete.
Safety Precautions
Always ensure the battery’s voltage aligns with the capacitor’s voltage rating to prevent overcharging or undercharging. Monitor the process closely to avoid any electrical hazards.
Working in a well-ventilated area is also advisable to efficiently dissipate any heat generated during the charging process.
Conclusion
Charging a capacitor without a resistor is possible and can be efficiently achieved using an inductor or a light bulb. However, it’s paramount to observe safety precautions to prevent overcharging and ensure the longevity of the capacitor.
Always monitor the charging process closely and adhere to the capacitor’s specifications to ensure a safe and effective charging process.
Frequently Asked Questions
What happens when capacitor is fully charged?
When a capacitor is fully charged, it holds the maximum energy it can store in its electric field and reaches the same voltage as the source providing the charge. At this point, it stops drawing current from the power source, effectively blocking the flow of direct current (DC) while allowing alternating current (AC) to pass through.
What happens if you charge a capacitor for too long?
If a capacitor is charged for too long, it can become overcharged, leading to an excess buildup of electrical energy. This overcharging can cause the capacitor to fail, resulting in leakage, explosion, or damage to the surrounding circuit components due to the excessive heat and pressure generated.

Author
Alex Klein is an electrical engineer with more than 15 years of expertise. He is the host of the Electro University YouTube channel, which has thousands of subscribers.