
How to test a fuse without a multimeter?
The multimeter allows you to run all sorts of tests on fuses, which involve either testing its voltage or continuity.
However, since you are here, we guess you don’t have one by your side to carry out the necessary tests.
Thankfully, there are multiple methods of testing whether a fuse has gone bad or not, with some easier than others.
This article presents you with a step by step guide on testing a fuse without a multimeter, including information on a simple method called Swapping.
Let’s get right in.
Tools Required To Test A Fuse
To test a fuse without a multimeter, you need
- A light bulb
- A voltage tester
- A non-contact voltage detector
How To Test A Fuse Without A Multimeter
To test a fuse without a multimeter, you either make use of a light bulb, a voltage tester, or a non-contact voltage detector. If you don’t get a glow or beep from any of these electrical instruments, then the fuse is not working and should be replaced. You may also carry out a visual inspection.
The basic goal for testing fuses is to check whether the thin fuse link in them has burnt out due to an overload of current.
Within a circuit, a blown fuse prevents current from flowing through, which makes it incomplete.
All the electrical items for the various tests have unique procedures and we will get into detail one after the other.
How To Test with Light Bulb
To test a fuse with a bulb, you connect the fuse in series with the bulb, run current through the circuit, and check if the bulb comes on. If it doesn’t, then the fuse is not working and needs to be changed.
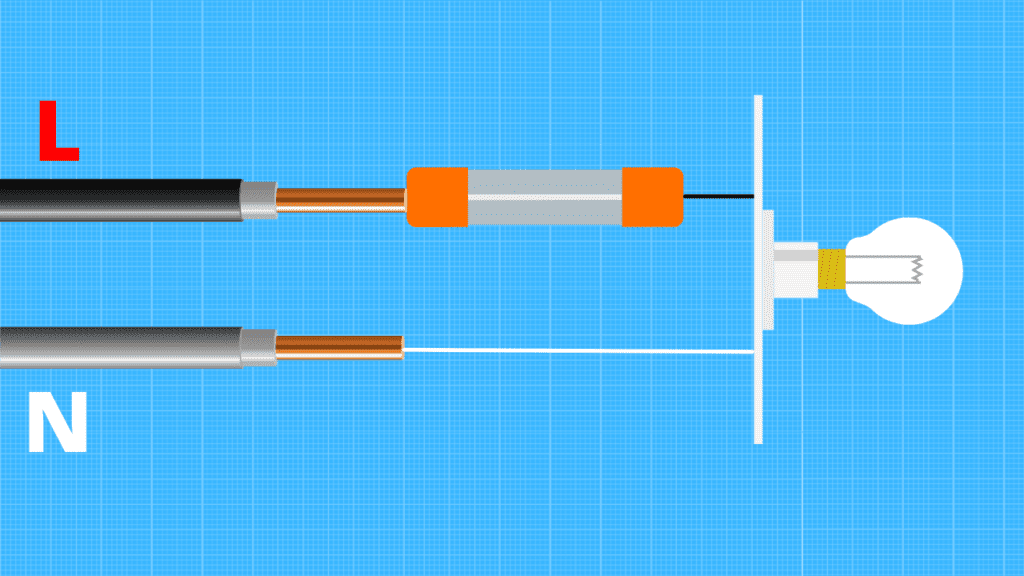
Connecting the bulb in series with the fuse means that current doesn’t get to the bulb unless it passes through the fuse.
A burnt fuse prevents current from flowing, while a good fuse allows current to flow to the bulb to turn it on.
Follow these steps.
- Get A Compatible Power Source, Light Bulb, and Wire
The first thing you want to do is get a power source that is compatible with the bulb and fuse you want to test.
You gather components that have the same volt specifications, making sure that the fuse doesn’t get burnt in the process, in case it is still good.
You also get a piece of wire that is about 30cm in length, as this is what you use to make connections.
The best practice concerning the power source is to make use of a battery with the same specifications as the fuse.
This makes the test a whole lot easier and safer to carry out.
The next steps are in the context of testing a 10Amp fuse using a 12V battery and bulb. A car brake light bulb is great for this.
- Attach Light Bulb To The Fuse
Expose about 2cm of the wire at both ends.
Wrap one end around the bulb and hold it in place with rubber tape, remove the fuse from the device, then wrap the other end of the wire around one side of the fuse.
- Connect Light Bulb And Fuse To Battery
Now, you place the metal part of the bulb on the positive terminal of the battery and the other end of the fuse (without wire) on the negative terminal of the battery.
- Evaluate Results
At this point, and if the fuse is in good condition, the bulb is expected to turn on. If the fuse is burnt or damaged, however, the bulb doesn’t come on as the circuit isn’t complete. It should be replaced.
The bulb test may take some time to set up, but it is one of the most effective methods of testing a fuse without a multimeter.
In case you want to use a live wire instead of a battery, you link the fuse to the bulb using the wire, place the bulb on the live wire, and place the other end of the fuse on a metal surface.
The bulb is also expected to come on if the fuse is in good condition. Be careful with this test by wearing rubber gloves to avoid getting electrocuted.
This is only one way, and there are other easier methods.
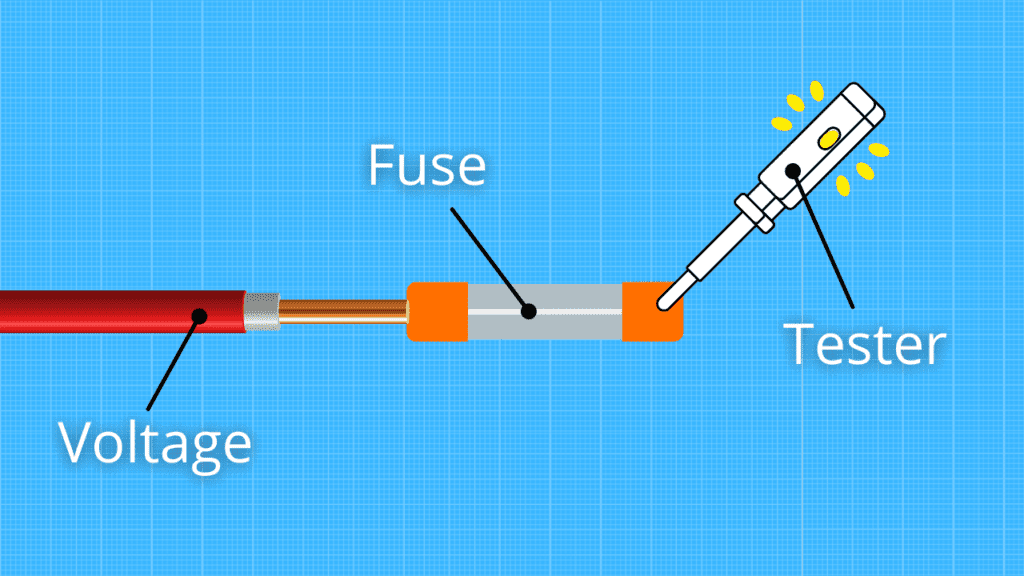
How To Test A Fuse Using A Voltage Tester
A volt tester is a tool that typically looks like a screwdriver with a bulb. It illuminates when the tip of the tester comes in contact with live volt at the other end of a good fuse.
- Place The Fuse On A Live Wire
To get power running through the fuse, connect it to a wire with current running through it.
Here, you simply attach one end of the fuse to the live wire and keep it steadily in place using rubber tape.
You may choose not to remove it from the device it’s in and then turn this device on.
- Connect The Voltage Tester To Ground
The tester usually comes with a probe at its bottom that is either a pointy lead or alligator clip. Connect it to a metal surface to ground the connection.
Some volt testers don’t come with these probes or clips but only require that you place your hand on its bottom to complete the circuit instead.
- Place Tester On Other End Of The Fuse
Finally, you simply place the tip of the tester on the other end of the fuse.
If the fuse is in good condition, the bulb in the volt tester illuminates. This is because the circuit is complete and volt is passing out of this end of the fuse.
On the other hand, if the fuse link has blown or the fuse is not working, the bulb doesn’t come on. At this point, you need to replace it.
A battery may also be used for this test.
Here, you remove the fuse from the device, place one end of the fuse on the positive battery terminal, and connect the tester probe to the negative terminal.
You then place the tip of the tester on the other end of the fuse. The evaluation results are the same.
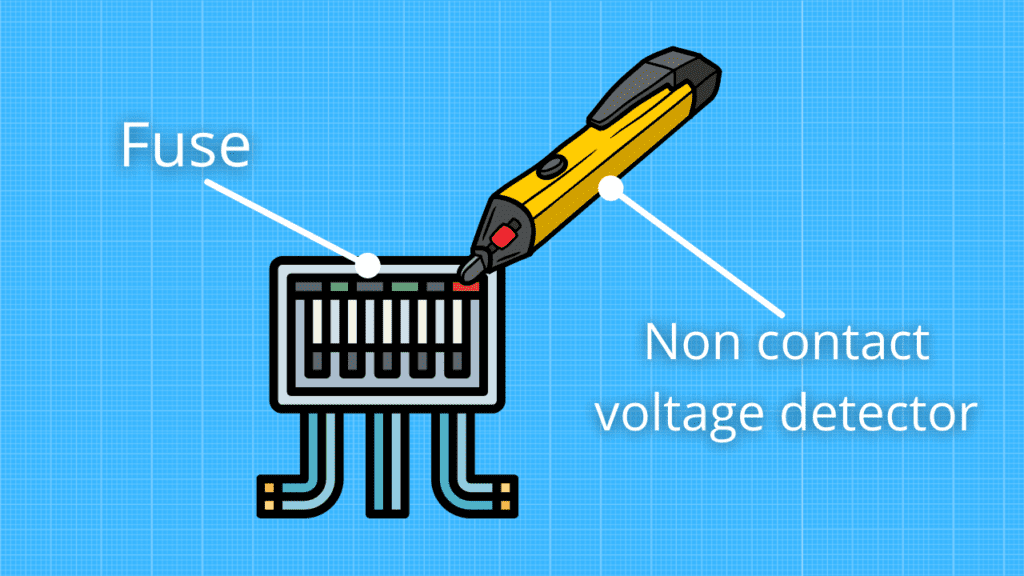
How To Test A Fuse Using A Non-Contact Voltage Detector
A non-contact voltage detector works just like the regular volt tester but you don’t need to place the tip of the tester on the fuse to get a result. It illuminates or produces a beep when it comes close to volt at the other end of the fuse.
- Attach The Fuse To The Live Wire
To get current running through the fuse, connect one end of it to a hot wire. You may keep it in place using rubber tape.
You may also leave it in its original electrical circuit and turn the device or power on.
- Test Voltage And Results
Now, you simply place the volt detector close to the other end of the fuse.
With a good fuse, the detector recognizes voltage at the other end either through a beep or illumination.
If you don’t get any of these, then the fuse has blown and should be replaced.
Sadly, the test with the non-contact detector is not entirely dependable, since it only needs to be close to current to beep or illuminate.
It could inaccurately recognize voltage from the live circuit even when it isn’t complete.
Diagnosing A Fuse Through Visual Inspection
A visual inspection is an easy way of diagnosing a fuse, as you simply check whether the fuse link has burnt out or snapped. This method is only feasible with fuses that are transparent, allowing you to check the link inside them. A bulge on the fuse also indicates that it is damaged.

Car fuses usually snap, while fuses used in home appliances typically blow up.
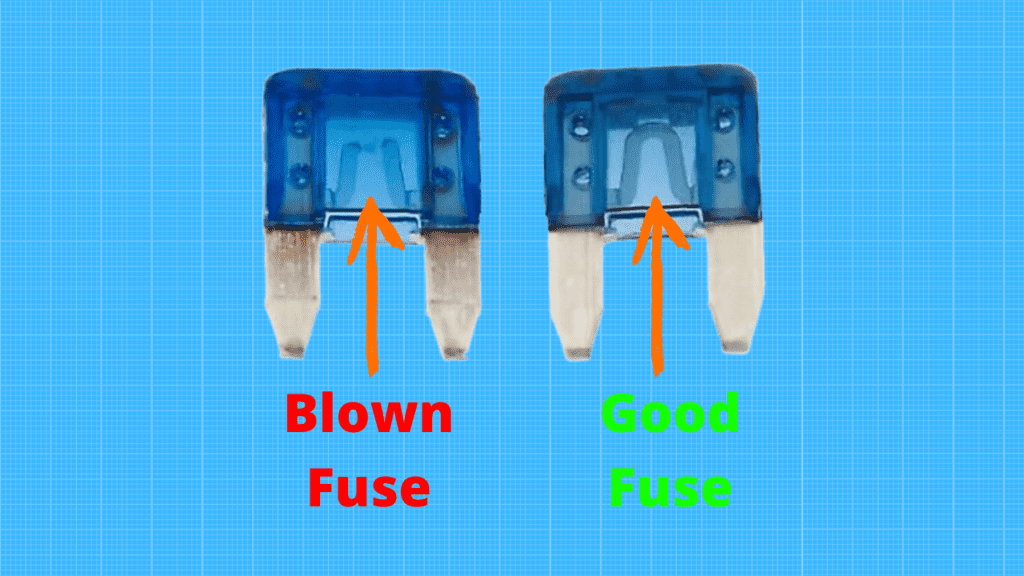
Sometimes, blown fuses are also darkened by the link burning, which makes it hard to check the inside of the fuse.
Due to this, dark marks, grey marks, or any form of discoloration on a fuse are also indications that it has blown or gone bad.
In addition to all these tests, however, you may also simply swap the fuse with a new fuse and check if the electrical device or circuit works as it should.
Called “swapping”, this is another easy way of testing if a fuse is working or not.
Conclusion
Although the multimeter is a comprehensive tool for this test, there are multiple methods of testing whether a fuse has gone bad without it.
Some of these are evidently safer than others, so you want to pick the best option for you amongst those listed above.
Frequently Asked Questions
Can A Fuse Be Bad Even If It’s Not Blown?
It is rare to see a fuse go bad without blowing, but this still happens. You may see this where the fuse is corroded due to moisture, which prevents it from working even if it looks fine.
What Happens When A Fuse Goes Bad?
When a fuse goes bad, the fuse link in it typically burns out or snaps. This means there is no connection between the two ends of the fuse, resulting in an incomplete circuit.

Author
Alex Klein is an electrical engineer with more than 15 years of expertise. He is the host of the Electro University YouTube channel, which has thousands of subscribers.