
How to Replace a Fuse in a Breaker Box
When the lights suddenly go out, or an appliance stops working, it’s often due to a blown fuse in your breaker box.
Fuses are crucial in protecting your home’s electrical system from overloads.
Let’s see how to replace a fuse in 5 easy steps without wasting time.
How to Replace a Fuse in a Breaker Box Step by Step
Now that you understand the critical importance of fuses and breaker boxes in safeguarding your electrical system, let’s delve into the heart of the matter, which involves skillfully replacing a blown fuse within your breaker box.
Step 1: Safety First
Ensuring your safety is paramount when you’re about to replace a fuse in your breaker box. Electrical work demands a cautious approach to prevent accidents, electrical shocks, or damage to your property.
The first and most critical action is to turn off the main power switch in your breaker box.
Located prominently at the top or bottom of the panel, this switch is your gateway to cutting off your house’s electrical supply. It’s usually labeled as “Main” or “Main Disconnect.”
Flipping this switch to the “Off” position is not negotiable; it’s the vital step that ensures there’s no live electrical current coursing through any of the circuits while you work on them. Doing so creates a safe environment for yourself, minimizing the risk of electric shock.
Personal protective equipment (PPE) is another layer of defense when working with electricity. Consider wearing insulated gloves and safety goggles, especially if your fuse replacement requires touching live wires.
While not mandatory for every fuse replacement, these items protect against accidental contact with live electrical components. Additionally, you must ensure your work area is dry. Electricity and moisture are hazardous, so be vigilant about working in a dry environment.
If your breaker box is in a damp area, take extra precautions and consider consulting a professional electrician to assess and address any water-related concerns.
Lastly, inform others in your household about your electrical work so they know the power will be temporarily shut off, preventing accidental power restoration while you’re working.
Step 2: Identify the Blown Fuse
Identifying a blown fuse is a critical step in replacing it. Fuses are designed to protect electrical circuits by breaking the circuit when too much current flows through them.
When a fuse blows, it interrupts the flow of electricity and prevents damage to your appliances and wiring. Here’s how to identify a blown fuse:
Visual Inspection
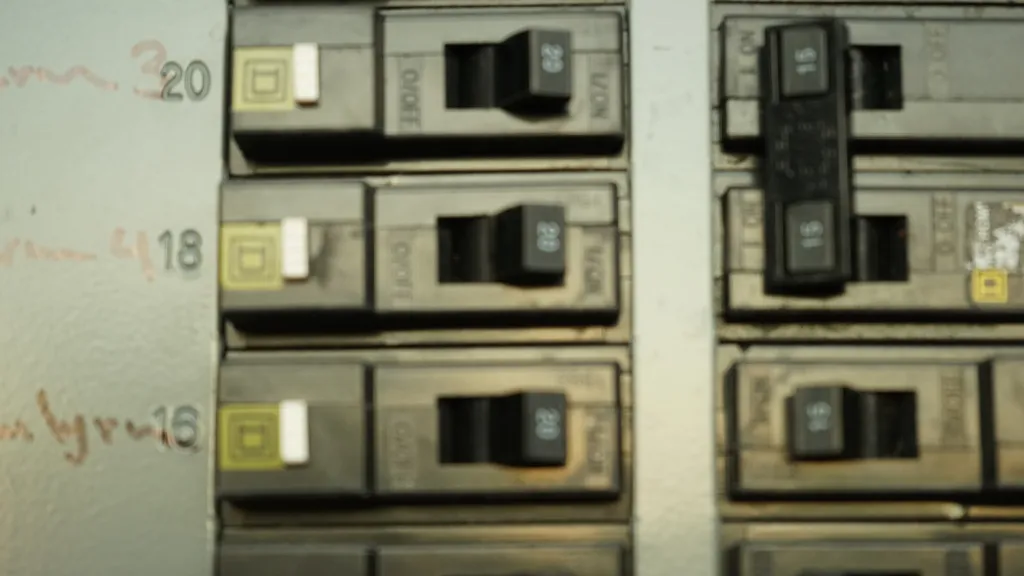
Begin by visually inspecting the row of fuses or circuit breakers inside your breaker box. Look for any signs of a blown fuse. A blown fuse is usually easy to spot. It may have a visibly broken wire or a discolored, burnt appearance.
Sometimes, you’ll see a small gap in the wire inside the fuse, indicating that it has melted due to excessive current. Carefully examine each fuse, paying close attention to the ones associated with the circuit or appliance that are not functioning.
Use a Flashlight
In some breaker boxes, lighting may be limited, making it challenging to see the condition of the fuses. Using a flashlight can help you inspect the fuses more effectively.
Shine the light on each fuse, looking for any visible signs of damage or discoloration.
If you need clarification on whether a fuse is blown, compare it to the other fuses in the box. A healthy fuse should have an unbroken wire and appear similar.
If you notice any discrepancies, it’s a good indicator that you’ve found the blown fuse.
Identifying a blown fuse is a crucial skill for homeowners. It allows you to pinpoint the source of electrical issues quickly and take corrective action.
Once you’ve identified the blown fuse, you can move on to the following steps to safely replace it and restore power to the affected circuit or appliance.
Step 3: Remove the Blown Fuse
Once you’ve ensured your safety and confirmed the power is off, you can locate and remove the blown fuse from the breaker box. This step involves a combination of careful observation and gentle handling to prevent any damage or accidents.
Inspect the Blown Fuse
Start by closely examining the row of fuses or circuit breakers within your breaker box. Look for the fuse that needs replacement.
A blown fuse is relatively easy to spot. It may have a visibly broken wire inside or show signs of discoloration, often appearing burnt or charred.
This visual inspection helps you confirm which fuse has caused the electrical issue you’re addressing. It’s essential to be precise in identifying the faulty fuse to prevent unnecessary disconnection of other circuits.
Gently Remove the Blown Fuse
To remove the blown fuse, use a suitable tool, such as a fuse puller or pliers designed explicitly for electrical work. Carefully insert the tool into the socket that holds the blown fuse and gently apply pressure to grip it securely.
With a firm grip on the fuse, pull it out of the socket slowly and steadily.
Be cautious not to use excessive force or damage the box’s surrounding fuses or metal components. Maintaining a gentle touch and deliberate movements ensures the fuse is safely extracted without causing unintended damage or hazards.
Step 4: Replace with the Correct Fuse
Replacing a blown fuse with the right one is a critical step in the process. Fuses are designed with specific amperage ratings, indicating the maximum current amount they can safely handle.
Using a fuse with the wrong amperage rating can lead to electrical issues, including overloads and potential hazards.
Identify the Correct Amperage
Examine the blown fuse you removed in Step 3 to ensure you’re using the correct fuse. The amperage rating should be marked on the fuse itself.
Standard amperage ratings for household fuses include 15, 20, and 30 amps.
Selecting a replacement fuse with the same amperage rating as the one you removed is crucial. Using a fuse with a higher rating may overload the circuit, while using one with a lower rating may result in frequent fuse blowouts.
If the amperage rating is not visible or legible, consult the user manual for your electrical panel or breaker box to determine the appropriate amperage for that specific circuit.
Insert the New Fuse Carefully
Once you have the correct replacement fuse, carefully insert it into the empty socket in the breaker box. Ensure that the fuse is seated securely and properly aligned. A loose or misaligned fuse can lead to poor electrical connections and potential hazards.
Gently press the fuse into place until it’s snug, but avoid using excessive force, as this can damage the fuse or the socket. Properly installed, the new fuse should fit securely in its slot, ready to protect your electrical circuit from overloads and faults.
Step 5: Reconnect and Test
Once you have successfully replaced the blown fuse with a new one of the same amperage rating, it’s time to reconnect the power and test the circuit or appliance that previously had issues. This step ensures that your electrical system functions correctly after the fuse replacement.
Reconnecting the Power
After securely placing the new fuse into its socket and confirming that it is seated correctly, carefully close the cover of the breaker box. Make sure the cover is securely fastened in place.
This protective cover is essential to prevent accidental contact with live electrical components within the box. Once the cover is closed, you can proceed to restore power.
Locate the main power switch in your breaker box. As a reminder, this switch is typically positioned at the top or bottom of the panel and is labeled as the “Main” or “Main Disconnect.”
Flip this switch back to the “On” or “Closed” position cautiously. As you do this, be attentive to any unusual sounds or signs of sparking.
If you notice anything unusual, immediately switch the power back off and recheck your work.
Testing the Circuit or Appliance
With power restored, head to the circuit or appliance that had previously experienced issues. This could be a room’s lighting, a kitchen appliance, or any other electrical device connected to the circuit.
Turn on the affected device or switch the lights to verify that they operate correctly. Ensure that there are no flickers or unusual behavior.
Testing the circuit or appliance is essential because it confirms that the fuse replacement has resolved the issue. If everything functions as it should, you’ve completed the process.
However, if the problem persists or you encounter any irregularities, immediately turn off the power and reevaluate your work. In such cases, it may be advisable to seek the assistance of a qualified electrician to diagnose and address any underlying electrical issues.
Why is fuse important?
Fuses may appear unassuming, but they are paramount in safeguarding your home’s electrical infrastructure. These small yet powerful devices act as vigilant sentinels, tirelessly monitoring the flow of electrical current to ensure your household remains safe from potential hazards.
Let’s explore why fuses are essential and how they fulfill their crucial role in electrical safety.
1. Preventing Overcurrent Hazards
Imagine your home’s electrical system as a network of interconnected highways, with electricity flowing like traffic along these circuits. Just as a traffic cop manages congestion on the road, fuses serve as guardians of the electrical pathways.
Their primary function is to intervene when too much current surges through the circuit, effectively breaking the circuit to prevent overloads.
2. Averting Electrical Fires
Electrical fires are a terrifying and potentially deadly threat that can arise from overloaded circuits or faulty wiring. Fuses act as a first line of defense against such disasters.
When a circuit experiences an excessive current surge, often due to a short circuit or a malfunctioning appliance, the fuse sacrifices itself by melting or blowing, interrupting the flow of electricity. Doing so prevents the excessive current from overheating wires and igniting a fire.

3. Protecting Appliances and Equipment
Your electrical appliances and devices, from refrigerators to televisions, rely on the consistent and stable flow of electricity. An overloaded circuit can damage these expensive assets and pose safety risks to your home.
Fuses act as guardians, ensuring that the electrical current remains within safe parameters, thus extending the lifespan of your appliances and preserving their functionality.
4. Preserving Wiring and Infrastructure
In addition to safeguarding your appliances, fuses protect your home’s wiring and electrical infrastructure. Overloaded circuits can damage wiring, posing safety concerns and significant repair expenses.
Fuses prevent this by acting as a fail-safe mechanism interrupting the circuit before any harm to your electrical system can occur.
5. Cost-Effective Protection
Fuses are an economical means of ensuring electrical safety. They are inexpensive compared to other protective devices, such as circuit breakers. This cost-effectiveness makes them essential to your home’s electrical defense system.
6. Ease of Replacement
Replacing a blown fuse is a relatively straightforward process that most homeowners can undertake. This simplicity allows for quick power restoration during a circuit interruption.
However, always prioritize safety when replacing fuses, following established procedures, and using the correct replacement fuse.
What do you need to know about a breaker box?
Your home’s electrical system is a complex network that powers everything from your lights and appliances to your gadgets and devices. At the core of this intricate web is the breaker box, also known as the electrical panel or distribution board.
To navigate your electrical system effectively and ensure your home’s safety, it’s essential to understand the critical aspects of your breaker box.
The Breaker Box Unveiled
- Location Matters: Your breaker box is typically situated in a utility room, basement, garage, or sometimes in a dedicated electrical closet. It is essential to understand its location, as this information becomes critical during emergencies or maintenance tasks.

- Circuit Control: Within the breaker box, you’ll find a series of circuit breakers or fuses, each responsible for controlling the flow of electricity to a specific area or set of electrical outlets in your home. These breakers act as gatekeepers, regulating the current to prevent overloads and potential electrical hazards.
- Circuit Breakers vs. Fuses: You might encounter fuses instead of circuit breakers in older homes. Fuses serve a similar purpose but operate differently. They contain a thin wire that melts when excessive current flows through, interrupting the circuit. Modern homes typically feature circuit breakers, which can be reset after tripping, while fuses require replacement.
- Labeling Matters: To effectively manage your electrical system, your breaker box should be labeled appropriately. Each breaker or fuse should correspond to a specific area or appliance in your home. Labels help you quickly identify which circuit to turn off or reset when needed.
Why Understanding Your Breaker Box is Vital
- Safety: Knowledge of your breaker box is paramount for safety. In electrical emergencies, such as a short circuit or overload, quickly locating and switching off the appropriate breaker can prevent fires and protect your home from electrical damage.
- Maintenance: Understanding your breaker box is crucial for planning electrical work or modifying your home. You’ll need to know which circuit to shut off to ensure your safety while working with electrical components.
- Troubleshooting: Knowing your breaker box allows you to check for problems systematically when electrical issues arise. If a specific outlet or appliance stops working, you can identify the corresponding circuit to investigate further.
Tips for Breaker Box Maintenance
- Regular Inspections: Periodically inspect your breaker box to ensure it’s in good condition. Look for signs of damage, corrosion, or overheating.
- Keep Clear: Avoid placing objects before or around the breaker box. In an emergency, easy access is crucial.
- Proper Labeling: If your breaker box needs to be labeled comprehensively, take the time to do so. Create a clear and accurate map of which circuits control what in your home.
- Professional Help: Consult a qualified electrician for major electrical work or if you are unsure about any breaker box aspect. Electrical systems can be complex, and safety should always be the priority.
How have fuses in houses evolved?
Fuses have been a cornerstone of electrical safety in homes for centuries, and their evolution is a testament to the ever-advancing field of electrical engineering. Over time, these humble devices have undergone significant changes, transitioning from rudimentary materials like lead and iron to the sophisticated and highly efficient modern fuses we rely on today.
Historical Perspective
In the early days of electricity, when Thomas Edison and Nikola Tesla pioneered electricity use in homes, fuses were a relatively simple yet critical component. These early fuses were often crafted from materials like lead, iron, and other metals, designed to provide basic protection against overcurrents and electrical faults.
However, these early fuses had limitations. They could have been more precise than modern fuses regarding their response to overloads and could be slow to react to faults. This posed risks to both electrical systems and the safety of homes.
The Transition to Modern Fuses
The evolution of fuses gained momentum as electrical systems became more widespread and complex. With the advent of the 20th century, electrical engineers and innovators recognized the need for safer and more efficient fuses to protect homes and appliances.
- Improved Materials: One of the first significant changes in fuse technology was adopting materials with superior conductive and melting properties. Early fuses often relied on less predictable alloys to respond to electrical faults. Modern fuses utilize carefully engineered materials like copper, which offer more precise and reliable performance.
- Faster Response Times: Modern fuses are designed for rapid response. When an excessive current flows through a circuit, a modern fuse will melt or blow within milliseconds, effectively cutting off the power supply. This swift reaction helps prevent electrical fires and damage to appliances.
- Standardization: In the early days, fuses came in various shapes and sizes, making it challenging to replace them if needed. Modern fuses adhere to standardized specifications, ensuring compatibility and ease of replacement. This standardization simplifies identifying and selecting the correct fuse for a specific application.
- Specialized Fuses: As electrical systems became more diverse and complex, specialized fuses were developed to meet specific needs. For example, fuses are now designed for high-voltage applications, automotive use, and even sensitive electronic circuits. These specialized fuses offer tailored protection for various scenarios.
- Integration with Circuit Breakers: Traditional fuses are standalone devices, but modern homes often feature circuit breaker panels that combine circuit protection and switching. Circuit breakers have replaced traditional fuses in many residential applications due to their convenience and the ability to reset them after tripping.
Frequently Asked Questions
Can you replace a breaker fuse yourself?
Yes, you can replace a breaker fuse yourself, but prioritize safety, turn off power, and follow a step-by-step guide.
How do you know if a breaker fuse is blown?
To check if a breaker fuse is blown, examine it for visible signs such as a broken wire or discoloration. For electrical certainty, use a multimeter, an essential tool.

Author
Alex Klein is an electrical engineer with more than 15 years of expertise. He is the host of the Electro University YouTube channel, which has thousands of subscribers.