
How to Measure Current With a Multimeter
If you’ve ever tinkered with electronics or needed to troubleshoot a gadget at home, you’ve probably heard about the trusty multimeter. This little tool is like the Swiss Army knife for electrical systems.
In this article, I will walk you through one of its most useful functions: measuring current.
Understanding the Basics
When I first entered this world of electronics, the term ‘electrical current’ sounded pretty intimidating. But it’s a simple concept. Think of electrical current as the flow of water through a pipe.
In our case, it’s the flow of electrons through a wire or circuit. Just like knowing how much water flows through a pipe can be crucial for a plumber, understanding the flow of electrons is key for anyone working with electronics.
We must know two current types: AC (Alternating Current) and DC (Direct Current). AC is like the electricity that powers your home appliances.
It’s called ‘alternating’ because the flow of electrons changes direction periodically. On the other hand, DC, which you find in batteries, flows in one constant direction. Why does this matter?
Well, your multimeter needs to be set accordingly to measure each type correctly, and trust me, setting it wrong can lead to some confusing readings!
Now, let’s talk about the multimeter itself. These gadgets come in two flavors: analog and digital. Analog multimeters have a needle that moves over a scale to display readings, like the speedometer in a car.
Digital multimeters, or DMMs, show readings on a digital display, and they’re generally easier to read and more accurate. I prefer digital ones, but it’s a matter of personal choice.
The key components of a multimeter that are relevant for measuring current include the display (where you read the measurements), the dial (used to select different functions and ranges), and the ports where you plug in the probes. Probes are like the multimeter’s hands, allowing you to connect it to the circuit you’re testing.
Safety Precautions
Okay, before we jump into the fun part of using a multimeter, let’s talk about safety. I can’t stress enough how important this is. Electricity is beneficial, but it doesn’t play around.
I’ve had a few hair-raising experiences and learned that taking simple precautions can save you from shocks, short circuits, or damaging what you’re trying to fix.
First and foremost, respect electricity. Even a small amount can be dangerous. Here’s my checklist of safety tips I always run through before measuring current:
- Turn Off Power: If possible, always turn off power to the circuit you’re working on. It’s the safest way to avoid shocks. Be extra cautious if you need to measure current in a live circuit.
- Use Insulated Tools: Most multimeters and their probes have insulated handles. Please make sure they’re in good condition. No cracks or breaks, please! This insulation is a lifesaver, quite literally.
- Right Setting and Range: Before connecting your multimeter to a circuit, ensure it’s set to the correct measurement type (AC or DC) and an appropriate range. Start with the highest range if you’re unsure about the current you’re measuring. You can always dial down.
- One Hand Rule: This might sound odd, but use one hand when connecting the multimeter to a circuit. Keep your other hand in your pocket or away from conductive materials. It reduces the risk of a current passing through your chest, which can be dangerous.
- Proper Connections: Ensure your probes are properly connected to the multimeter. The black probe typically goes into the common (COM) port, and the red probe goes into the port marked for measuring current (often labeled ‘A’ for amperes).
- Inspect Your Equipment: Before using your multimeter, give it a quick visual inspection. Look for any damage, exposed wires, or anything unusual. Safety first!
- Stay Alert: Don’t get distracted. I know it’s easy to lose focus, especially if you’re in the middle of a tricky project, but staying alert can prevent accidents.
- Know Your Limits: If you’re unsure or uncomfortable with measuring current in a particular situation, it’s okay to ask for help or consult a professional. There’s no shame in playing it safe.
Preparing the Multimeter
Okay, now that we’ve got our heads around the basics, it’s time to get our hands on the multimeter. Preparing your multimeter for use is like getting ready for a road trip.
You don’t just jump in the car and go; you check the map, fuel up, and maybe grab some snacks. Similarly, setting up your multimeter correctly is crucial for a successful and safe measurement journey.
First things first, you’ve got to pick the right multimeter for the job. If you’re like me when I started, you might have a basic multimeter, which is fine for most DIY projects. If you plan to measure something with a high current, ensure your multimeter can handle it. It’s like not using a compact car to tow a huge trailer – you need the right tool for the job.
Once you’ve got your multimeter, it’s time to set it up. This part used to intimidate me, but it’s pretty straightforward.
You’ll want to turn the dial to the current measurement setting. Remember, there’s usually a separate setting for AC (alternating current) and DC (direct current). Choose the one that matches your project. If you’re unsure whether you’re dealing with AC or DC, start with AC; it’s the safer bet.
Next up, select the appropriate current range. This can be like guessing how much gas you’ll need for your road trip without knowing the distance.
If you’re unsure how much current you’ll measure, start with the highest setting. It’s better to read too little and then adjust down than to overload your multimeter immediately.
Also, it’s super important to know the limits of your multimeter. Just like you wouldn’t push a basic sedan to race car speeds, don’t push your multimeter beyond its maximum current rating. This information is usually found in the manual or printed on the multimeter.
Finally, let’s talk about the probes. These are your multimeter’s hands, reaching out to the world of electricity.
Most multimeters come with a pair of probes: one red (for positive) and one black (for negative). For measuring current, you’ll usually plug the black probe into the common (COM) port and the red probe into the port labeled for measuring current (often marked with an ‘A’ for amperes).
How to Measure Current With a Multimeter
Now that we’ve got the basics down, let’s get to the exciting part – measuring current with a multimeter. I remember the first time I did this; it felt like I was defusing a bomb with all the caution I had to take.
But don’t worry, it’s not as dramatic as it sounds, as long as you follow the steps carefully.
- Turning off Power to the Circuit: This is super important. Before you start, make sure the power to the circuit you’re working on is off. It’s like the “measure twice, cut once” rule in carpentry but with electricity. Safety first!
- Connecting the Multimeter in Series with the Circuit: This part is crucial now. Unlike measuring voltage, where you place the multimeter across the component, for current, you need to connect the multimeter in series. You must open the circuit and insert the multimeter directly into the electrical flow path. Think of it as adding a toll booth on a highway; the cars (electrons) must go through it.
- Selecting the Correct Measurement Type and Range: Here’s where you need to know your AC from your DC. Set your multimeter to the right type of current (AC or DC) based on your circuit. Also, start with the highest current measurement range to avoid blowing a fuse in your multimeter. You can always dial to a lower range for a more precise reading.
- Turning the Power Back On: You can turn the power back on once everything is hooked up and set. This is the moment of truth. Keep your fingers crossed (but away from any live wires!).
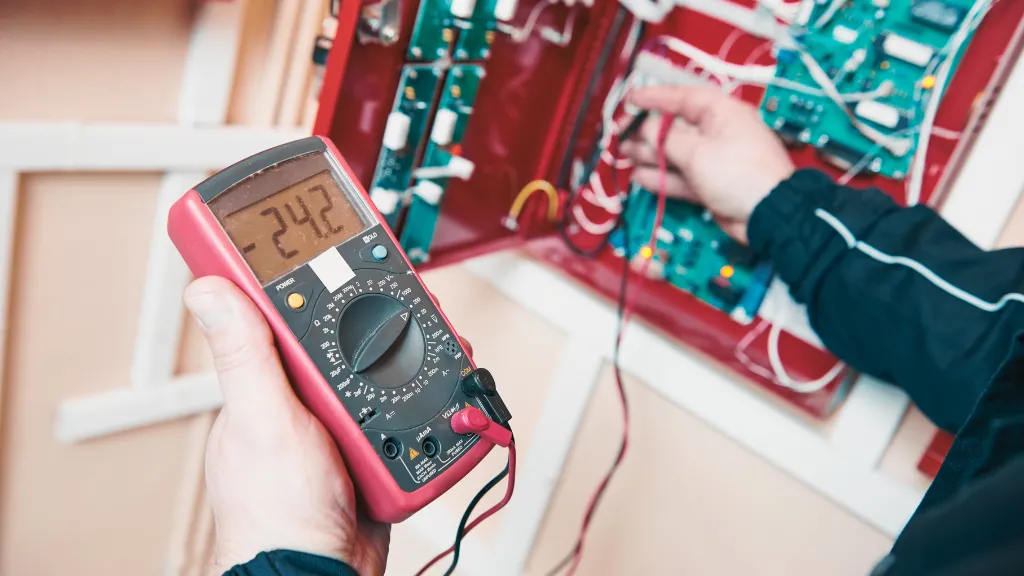
- Reading and Interpreting the Results: Look at your multimeter’s display. The number you see is the amount of current flowing through the circuit. Double-check your connections and settings if you’re getting a reading that’s off the charts or your multimeter is not responding.
Some tips for accurate measurements: Make sure your probes have good contact with the circuit and keep your hands steady. Also, be aware of any environmental factors that might affect the reading, like extreme temperatures or humidity.
Practical Applications
Now, let’s get into the fun part – how to use this skill in real life. Measuring current with a multimeter isn’t just a cool party trick (although I must admit, it does impress a few of my friends).
It has many practical applications that can come in handy in everyday situations.
- Electronics Troubleshooting: This is a big one. Have you ever had a gadget at home suddenly stop working? Before I learned to use a multimeter, I’d poke around in the dark, guessing what might be wrong. Now, I can measure the current and often pinpoint the issue. It’s like being a detective but for electronics. Whether it’s a faulty wire in a toy or a dead component in your TV remote, knowing how to measure current can save you time and money.
- Automotive Repairs: A multimeter can be your best friend if you’re into cars. Car batteries and alternators are all about DC. I’ve used my multimeter to check my car’s battery health and troubleshoot the electrical system. Diagnosing and fixing an issue without going to the mechanic is incredibly satisfying.

- DIY Projects: For all the DIY enthusiasts out there, a multimeter is invaluable. Whether building a simple electronic circuit, setting up a solar panel, or installing a new lighting fixture, measuring current ensures your setup is safe and effective. I’ve saved myself from several potential mishaps by double-checking my work with a multimeter.
- Educational Purposes: A multimeter is a great educational tool if you’re curious about how things work or teaching someone about electronics. I’ve used mine to explain basic electrical concepts to my nieces and nephews. It’s a hands-on way to learn about electricity and circuits.
- Home Appliance Repairs: Last but not least, home appliances. From checking if the toaster is drawing the right current to diagnosing a malfunctioning washing machine, a multimeter can be a household hero. It’s amazing how many appliance issues are related to electrical problems you can diagnose with a simple current measurement.
Conclusion
Alright, we’ve covered quite a bit of ground together! From those first steps of understanding current and the basics of a multimeter to measuring current and troubleshooting, I hope this journey has been as enlightening for you as it was for me when I first started.
Remember, measuring current with a multimeter isn’t just about following steps mechanically. It’s about understanding what’s happening in your circuit and being aware of the safety precautions. Electricity is fascinating, but it demands respect and careful handling.
I can’t stress enough the importance of accuracy and safety. Always double-check your multimeter settings, ensure you’re using the right mode for AC or DC, and never underestimate the value of a good safety practice.
These steps might seem tedious at first, but they become second nature with practice, and they’re your best friends in preventing mishaps.
And speaking of practice, that’s the key. The more you use your multimeter, the more comfortable you’ll become. Start with simple projects and gradually work your way up. Before you know it, you’ll measure current like a pro, troubleshoot circuits, and maybe even help friends and family with their electrical queries.
So, grab your multimeter, roll up your sleeves, and dive into electronics with confidence and curiosity. There’s a lot to learn and even more to explore. And remember, every expert was once a beginner. Happy measuring!

Author
Alex Klein is an electrical engineer with more than 15 years of expertise. He is the host of the Electro University YouTube channel, which has thousands of subscribers.