
Which Fuse Is for the Dashboard Lights (GUIDE)
Have you ever wondered why your car dashboard lights are out?
If your dashboard lights have suddenly stopped working, your dashboard light fuse may be the culprit and you may need to replace it.
This guide will provide a step-by-step answer on how to identify and replace a dashboard light fuse from the comfort of your home, as well as explain some other fixes to your dashboard lights going off in case replacing the fuse does not work.
Which Fuse Is for the Dashboard Lights
The dashboard light fuse is located in the fuse box, which is either under the car’s hood, beneath the dashboard, or close to the glove compartment. As there are multiple fuses in the box, you may check beneath it or your car manual for a diagram that specifies the “dash lights” or “lights” fuse.
Dashboard lights are an important part of your car’s safety features and having them functioning properly is essential for your vehicle’s well-being.
These fuses are usually low-amperage (5 amps to 7 amps) blade fuses designed to protect the wiring from short circuits and other overcurrent electrical issues.
Without a functioning fuse, your dashboard lights may malfunction, causing them to be dimmer than normal or not work at all.
Faulty dashboard lights can be dangerous, as they may lead to a failure to identify problems with your car or even accidents.
Replacing a blown fuse regularly does well to ensure that your dashboard lights remain in good working condition.
How To Fix Dashboard Lights
Although replacing the fuse is the usual answer to your dashboard lights not illuminating, there are certain steps you need to take before and after this replacement.
- Inspect the Dimmer Switch
- Replace Fuse
- Manually Replace the dashboard light bulbs
Inspect the Dimmer Switch
Examining the dimmer switch saves you the stress of having to replace the fuse or even directly deal with your dashboard bulbs.
The dimmer switch allows you to either reduce the brightness of your dashboard lights or turn it off completely. The problem is that you or another driver may have accidentally tripped the lights off.
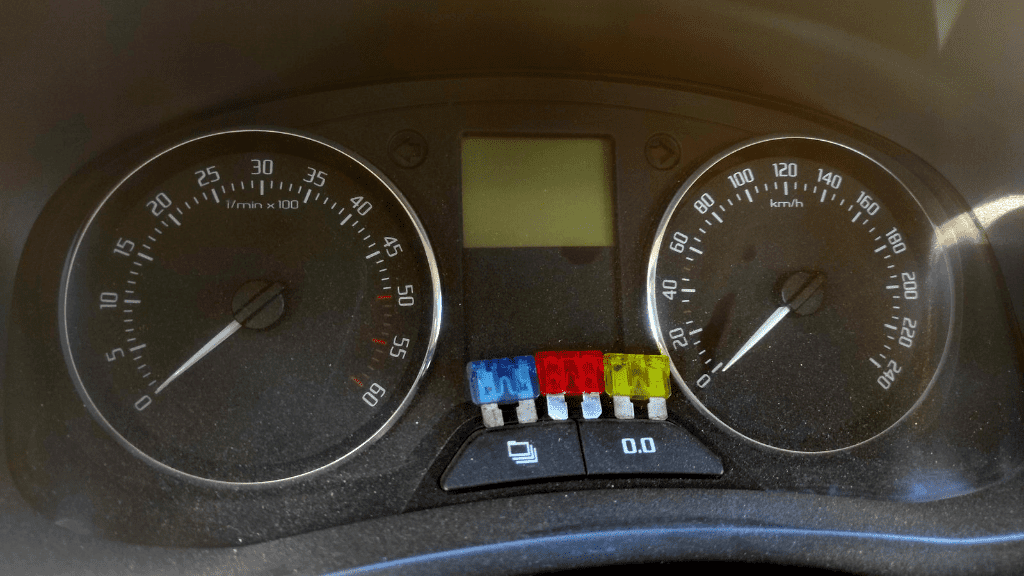
- Turn On Your Headlights
When your vehicle headlights are switched on, the dashboard lights automatically come on.
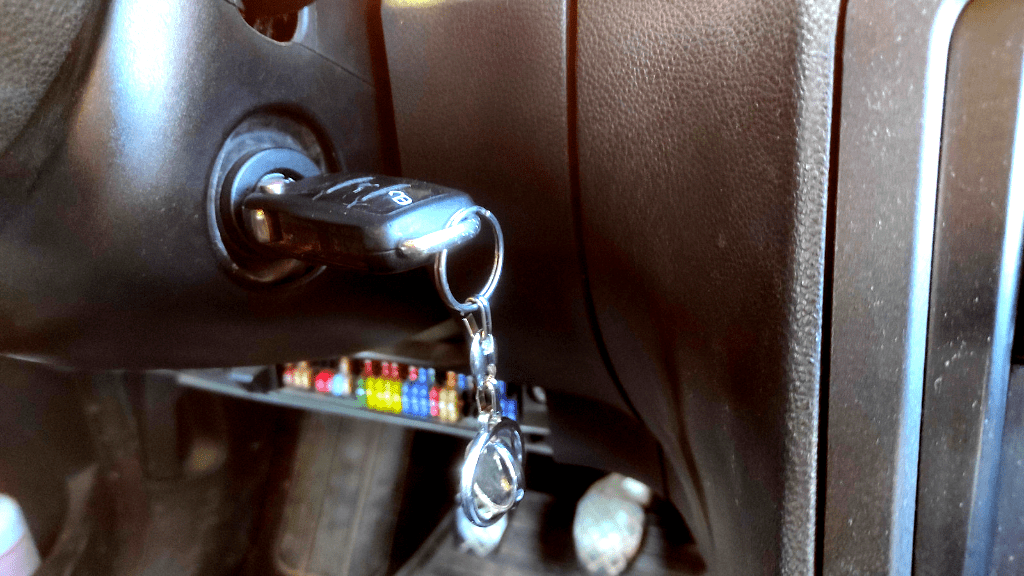
As you don’t need the engine to be running for this, turn the ignition key to the “on” or “accessory” position and then switch on your headlights.
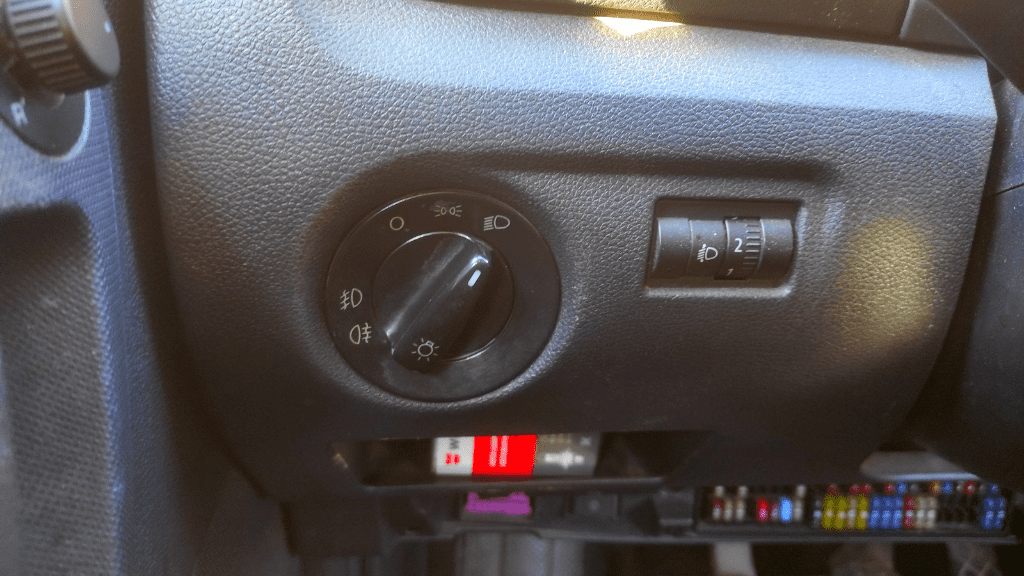
- Find the Dimmer Control Switch
The control switch, dial, or knob is usually located on the console near the steering wheel and, sometimes, it may be a part of the headlight switch. This is what you want to interact with.
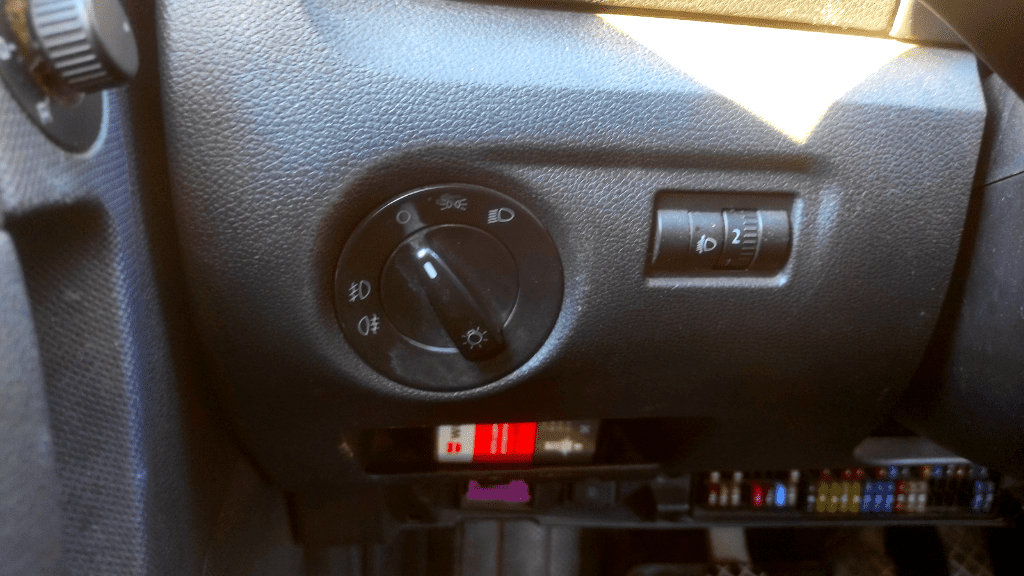
- Adjust the Dimmer Switch
Simply turn the dimmer switch to the direction for increasing the dashboard lights and check to see whether the problem is resolved. If your lights come on, you don’t need to take any other steps.
If the lights don’t come on, however, you may then have a blown fuse or a broken lightbulb and need to proceed to the other steps. Alternatively, the switch may be defective and needs to be replaced.
Replacing the Dashboard Fuse
If turning the dimmer switch did not work, replacing the fuse becomes the next step to take. To do this, follow these steps.
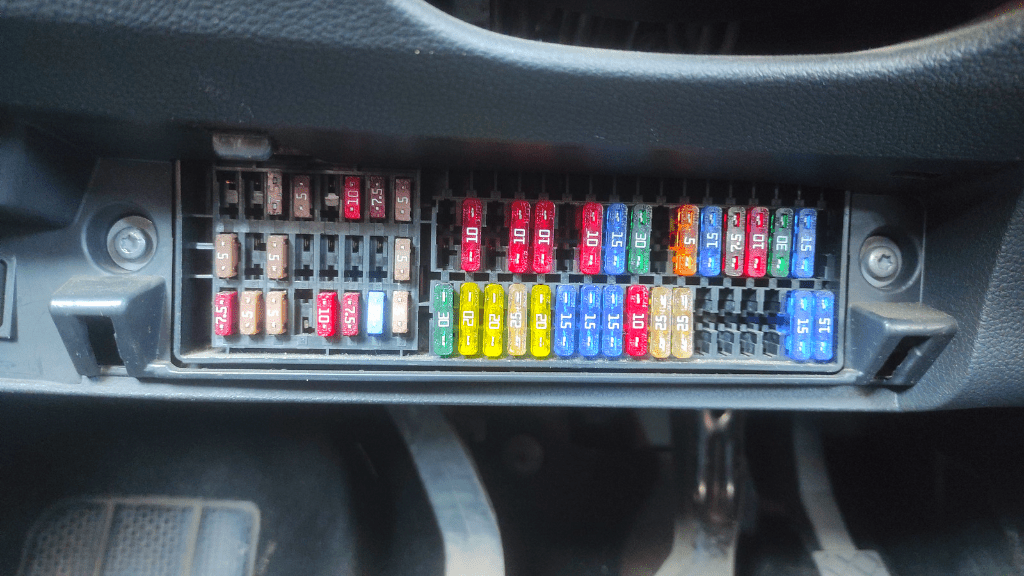
- Find The Fuse
With the car switched off, locate the fuse that regulates the supply of power to your dashboard lights.
As mentioned before, the fuse is located in the fuse box and the location of this box varies between vehicles. Some cars even have multiple fuse boxes.
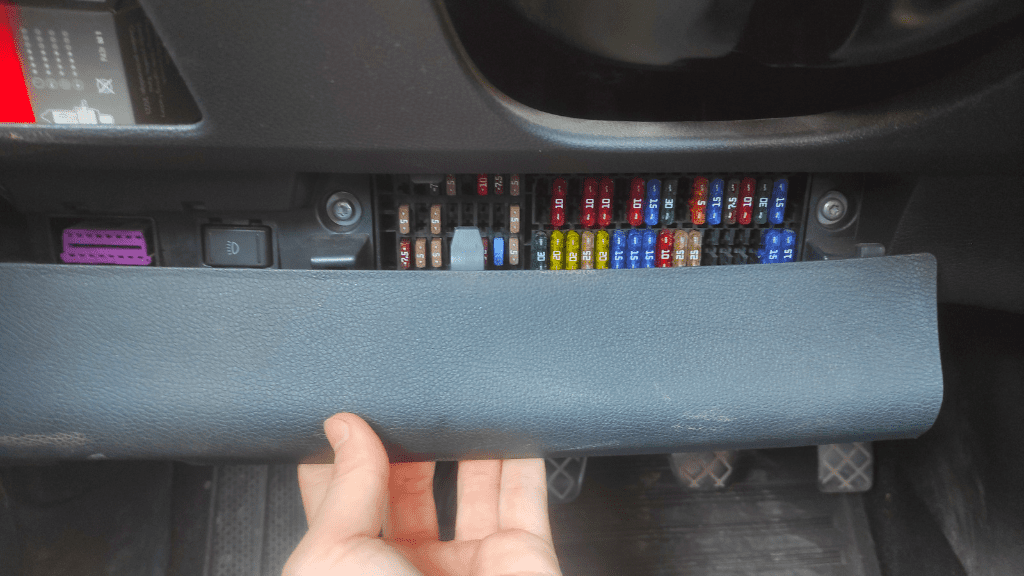
Check beneath the car’s hood, under the dashboard, and close to the glove compartment for any sign of a fuse box.
Once you’ve located the fuse box or boxes, remove the lid and look for a fuse labeled “dash lights” or simply “lights”.
This label is either directly on the fuse, found on the diagram at the underside of the fuse box, or shown within your car’s manual.
Sometimes, the fuse might just have a generic label like ACC or Dome Light.
- Examine the Fuse for Faults
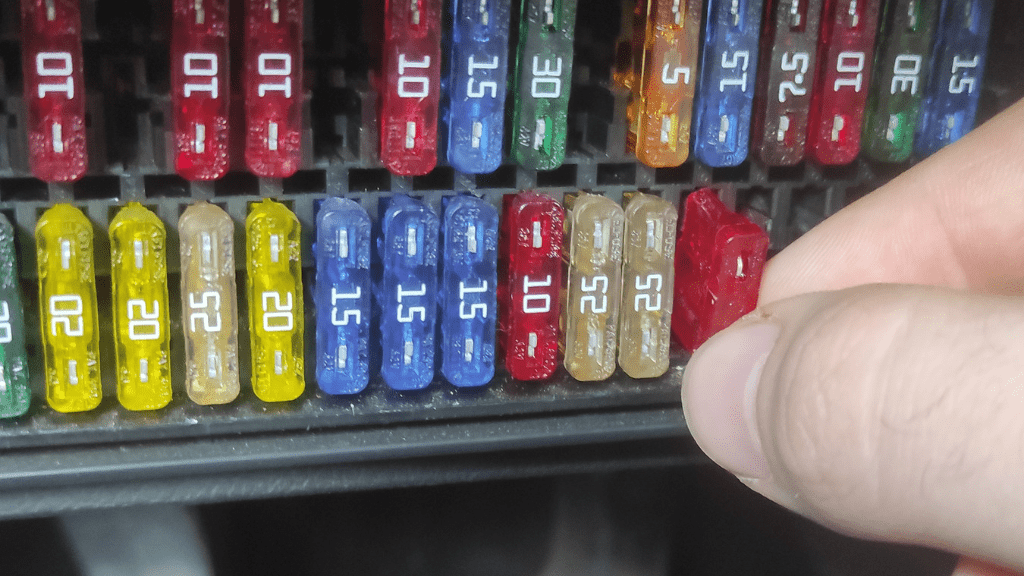
Once you have located the right fuse, you can then proceed to check whether it is blown or not.
During this examination, you inspect the fuse for dark burn marks which indicate it has blown, or test the fuse with a multimeter for more accuracy.
For visual inspection, remove the fuse that protects the dashboard lights with a fuse puller and if you don’t have a fuse puller, you can remove the fuse with a pair of needle-nose pliers.
You then examine the metal strip in it to see if it is broken (for transparent fuses) or inspect the fuse for blackening.

If the fuse appears to be in good working condition, this is when you proceed to check it with a multimeter to be sure. With a multimeter, you run a continuity test between the two blade ends of the fuse.
- Replace the Dashboard Fuse
Here, you simply replace the fuse with a new unit if it is blown. Make sure the new replacement is the same as the old blown fuse in terms of current and voltage ratings.
This rating information is expected to be printed on the fuse, as fuses are typically numbered and color-coded to aid in identification.
It should be noted that using a fuse with different ratings could result in an electrical hazard that damages your accessories even more.
Once you get the new fuse, insert it into the appropriate fuse slot until you hear a click. Replace the fuse box cover, then test the dashboard lights by turning on your vehicle and headlights.
Your dashboard lights are expected to come on at this point.
Changing the Dashboard Light Bulbs
If the lights don’t come on, then the fuse wasn’t the problem and you may proceed to replace the dashboard light bulbs.
- Cut Off Power in Your Car
The first thing you want to do is to turn off the power supply to avoid electrical shocks or shorts.
Switch off your vehicle, remove the key from the ignition, and you may also go the extra step to disconnect the cables at the negative and positive battery terminals.
- Take Off the Dashboard Trim.
The procedure for removing the trim varies depending on the vehicle. In general, you start by removing the bottom trim panel and proceed from there.
Remove the screws holding each piece of trim in place with a screwdriver, then pull the trim away from the dash.
To access the trim on some vehicles, you may need to remove the radio.
Keep track of all the screws and store them somewhere safe so you can replace them when you’re finished.
- Remove the Faceplate From the Instrument Cluster.
The faceplate protects the gauge panel on your vehicle’s dashboard and is held in place by spring-clip fasteners that should be easy to disengage.
Press the release tabs to disconnect the switches, controls, and cables on the back of the faceplate, then lift the faceplate out of the dash.
While doing this, avoid using a screwdriver because it can easily mark or damage the dash.
- Remove the Lightbulbs
Turn each bulb counterclockwise and carefully pull it out of its socket. To avoid breaking the glass, avoid turning or pulling the bulb too hard.
- Put in New Bulbs
Just like the fuses, you proceed to replace the lightbulbs with new units having the same features and specifications.
Touching the new bulbs with your hands is not recommended, so it is better you wear gloves or a rag to protect your fingers.
Even if some of the lightbulbs are still functional, it’s best to replace them all at once so you don’t have to go through the whole process again.
- Test New Bulbs
After making sure that all the bulbs have been properly fastened in place, you then test them to see if they are working.
Replace the faceplate and trim, reattach the battery, then turn on your car and headlights to do this.
Your dashboard lights are expected to work at this point, especially if you adjusted the dimmer switch and replaced both your dashboard fuse and bulbs.
If the problems persist after doing all this, then there could be problems with your dashboard wiring, and this requires even deeper levels of expertise from you to repair.
Types of Dashboard Light Bulbs
There are two major types of bulbs used inside your dashboard. These are incandescent light bulbs and LED light bulbs.
Incandescent light bulbs are the more common of the two, with these used as the standard applications inside old and even new vehicle models.
LED lights are the more modernized bulbs that come with new high-end vehicle models.
When it comes to replacing your bulbs, these LED lights make it difficult for an untrained individual to replace them from home.
Here you can find more detailed information about fuse working principle.
FAQs
Is There a Fuse for Your Dashboard Lights?
Yes. Like all automotive electrical systems, the dashboard lights have a fuse developed to go bad and disconnect the circuit when too much power is introduced to the system.
Where is my dashboard fuse located?
In most cars, the dashboard fuse is located in the fuse box either under the hood of the car or under the dashboard. The exact fuse is specified by a diagram in your car manual or under the box.

Author
Alex Klein is an electrical engineer with more than 15 years of expertise. He is the host of the Electro University YouTube channel, which has thousands of subscribers.