
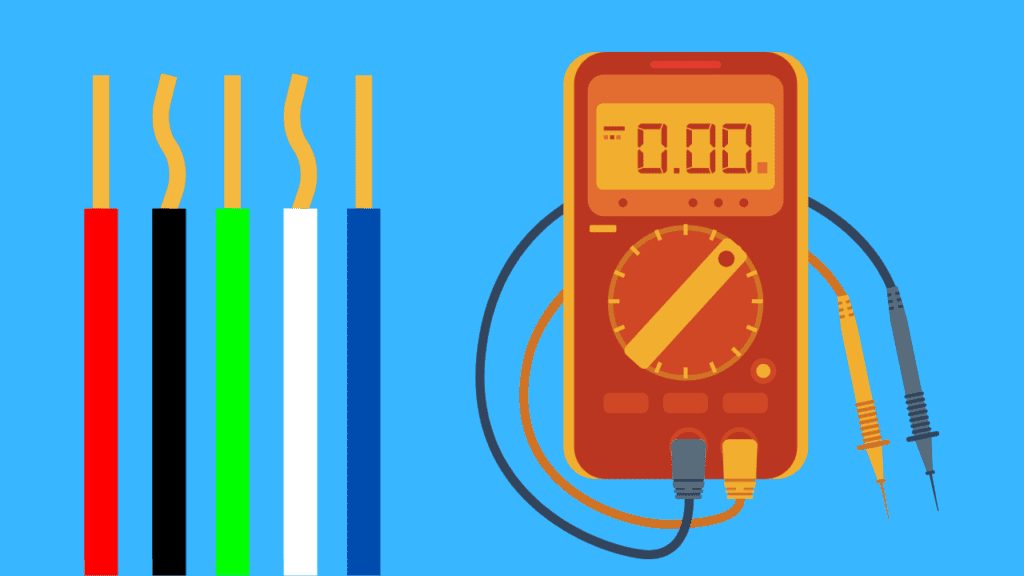
How to Trace a Wire with a Multimeter
Do you have an idle wire in your car or home that has you wondering where it leads to?
Are you having problems identifying if a piece of wire is good or not?
The solution remains to trace this wire or test it for continuity.
However, how do you do this?
This article takes you through all you need to know about testing electrical wires, including how to trace a wire from one spot to another and how to check if a wire is broken or not using multimeter.
Let’s get right in.
How To Trace A Wire With A Multimeter
To trace a wire with a multimeter, you set your multimeter to Ohms or continuity, place your red probe on one wire ending and then place the black probe on a suspected ending. If the multimeter reads “0” or beeps, then that is where the wire traces to. If it doesn’t, you test out other wire endings till you get one that brings the required result.
This is a general procedure and there is more to it. There are also other ways through which you may trace wires and find out if they are bad or not. We will go into details now.
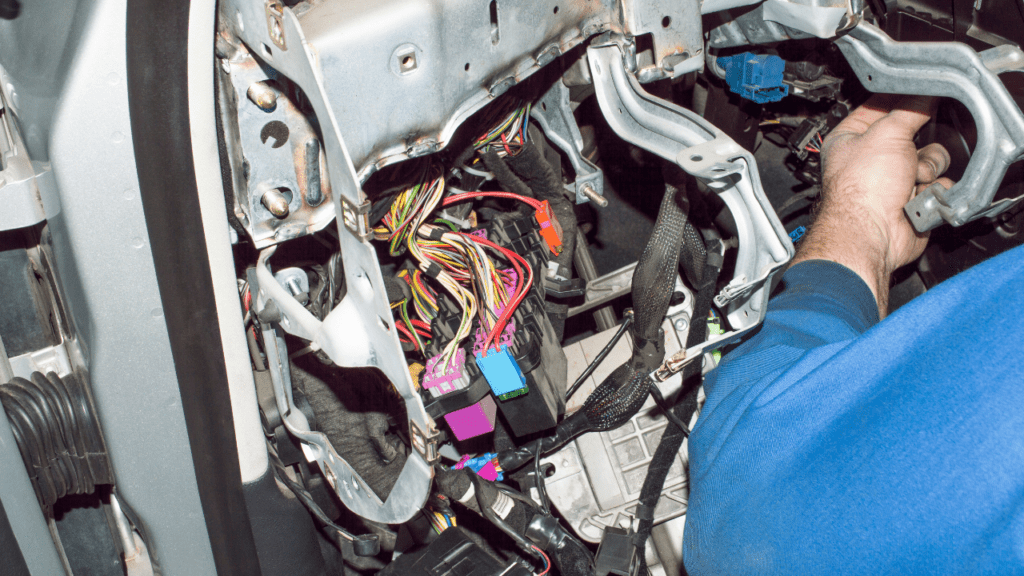
How To Trace Car Wire
Alongside a multimeter, you need the following tools to trace your car wires
- A small mirror
- A wrench
- A flashlight
Once all these tools are gathered, you follow the next steps.
Step 1: Turn Off Every Power Source
What you first do is disconnect your wire from every source supplying voltage or current to it.
The first source you want to look at is your battery. This is where your wrench comes in. You use your wrench to loosen and detach the bolt fastening cables to the battery.
You also check for other possible power sources, detach them, and ensure there is absolutely no current running through the wire you want to trace.
Step 2: Carry Out Physical Inspections
Before diving into the more elaborate testing process, you carry out visual inspections on the wire and look for physical signs of damage.
If the wire is damaged, successfully tracing it with a multimeter is impossible.
Carrying out a physical inspection helps you avoid further steps if possible.
Physical signs of damage may be represented by black spots along the wire insulation.
If you can’t reach or see certain parts of the wire, you may employ the use of a flashlight and small mirror.
You may also gently tug on the wire to ensure it is firmly in place. The wire may come off when you do this and you identify that this may be a problem.
If you don’t recognize any physical or visual problem with the wire, you proceed to the next step.
Step 3: Set Your Multimeter Dial
Now you set your multimeter to continuity mode (or Ohms if the multimeter doesn’t have a continuity mode).
Step 4: Position Multimeter Probes
Place the red multimeter probe on the exposed end of the wire you want to trace. This could be where it is soldered to a car device or attached using clips.
Place the black probe on any wire parts that are exposed or without insulation. Admittedly, there is most likely no opening before you get to the end of the wire and this means you can’t progressively trace it.
What do you do in this case?
You refer to a blueprint of your car connections and identify where all wires are expected to lead to. You do this to locate the expected location of the wire ending.
This expected location of wire ending typically consists of multiple wire endings. To trace your wire, keep your red multimeter probe on the initial end and individually place your black probe on different wire endings at the expected location.
Step 5: Evaluate Results
This is where you determine where your wire goes. If the multimeter reads infinity (1 or O.L), then that wire ending is not the same as the wire you want to trace.
If the multimeter reads “0”, then that is part of your wire.
Note that if the wire is bad, then it can’t be traced.
In case you want to test the wires of your car speakers check this guide.
Making use of a multimeter to trace wires isn’t a hard procedure. You are simply required to test for continuity from one end of the wire to identify the other end.
If you find it hard you can check our video on this topic.
However, when it comes to wires in homes and within walls, this is different.
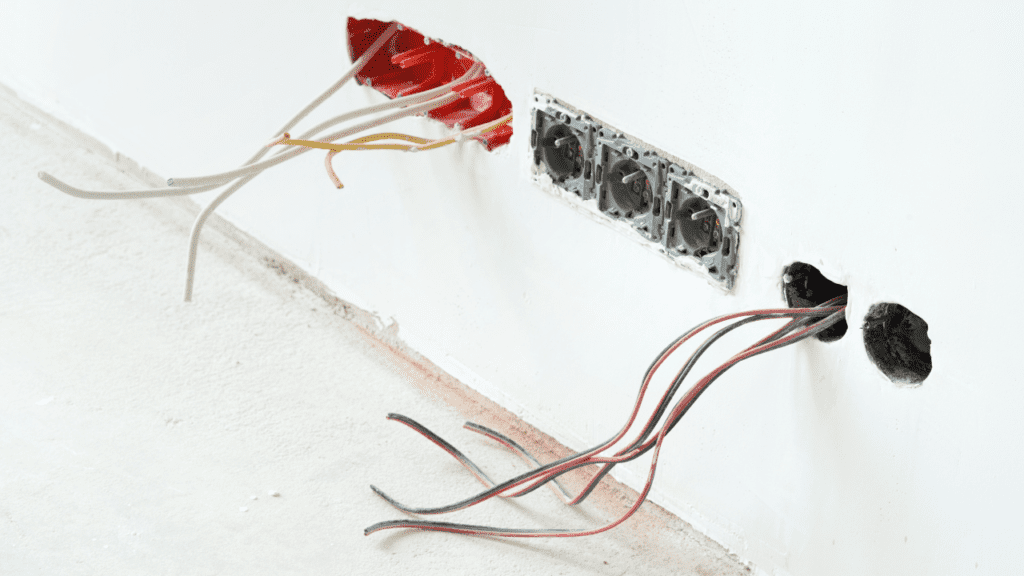
How To Trace Wire In Wall
Tracing electrical wires across different locations in your room or home isn’t the most straightforward thing to do.
This is because wires are within walls and the regular multimeter probes are not long enough to cover long distances.
To trace a wire over long distances, you need to pay attention here.
Step 1: Set Your Multimeter Dial
The first step is to set your multimeter to Ohms or continuity. The Ohms is usually represented by the (Ω) symbol.
Step 2: Extend The Wire Ending
Connect an extending wire to the main wire end you want to test out.
By this, we mean connecting a long cable from the first point of the wire you want to trace and extending this to another point in your room or home.
This other point is where you want to test out multiple wire endings.
Step 3: Position Multimeter Probes
Place your black multimeter probe on the extending cable and then individually place your red probe on each wire ending sticking out of the wall or outlet.
Step 4: Evaluate Results
If the multimeter beeps or shows a reading of “0” when placed on a particular wire ending, then that is the other end of the initial wire in question and where it traces to.
This process is better explained when visualized and you can check out this video on tracing electrical wires on exactly how to go about it.
Other devices can be used to trace wire paths and even a single wire within your home and behind drywall.
These devices include an electrical stud finder, a voltage detector, and a tone generator coupled with an amplifier examination.
How To Test Bad Wires With A Multimeter
In addition to tracing electrical wires, you may also want to know how to test if a wire is bad or not.
Wires go bad when they have aged, shorted, or been damaged by animals or even humans.
When a wire (circuit) is broken at a particular point, current does not completely pass through it. This means there is not continuity.
The continuity mode of your multimeter is designed specifically for situations like this.
To test bad wires with a multimeter, you take the following steps.
Step 1: Disconnect The Wire
The first step is to switch off or unplug the wire from any power source.
Live voltage doesn’t need to pass through your wires to test for continuity and disconnecting from all power sources also ensures your safety.
Step 2: Set The Multimeter Dial
Set your multimeter to continuity mode. If your multimeter does not have a continuity mode, switch the dial to Ohms
Step 3: Position Your Multimeter Probes
Place the red multimeter probe on one end of the wire and then place the black multimeter probe on the other end of the wire.
Step 4: Evaluate Results
If the wire is good, the multimeter emits a beeping sound if it is set to continuity mode.
When set to Ohms, the multimeter is expected to display a reading of “0” if the wire is good
For a bad wire, however, the multimeter does not beep when in continuity mode. When set to Ohms, your multimeter shows a high or infinite reading (1 or O.L) if the wire is bad.
You could watch this video on testing bad electrical wires showing exactly what to do and expect.
Additionally, you could also identify the exact spot where the wire has gone bad. This is an improvised method and you will need a needle to do this. Go along with the following steps.
- Set your multimeter to continuity mode or switch to Ohms as usual.
- Place the red multimeter probe on one point of the wire.
- Poke the wire with a needle at a point close to where the red probe is at. Make sure this needle is touching the metal string inside.
- Place the black multimeter probe on the needle and see if you get a beep or reading from the multimeter.
- If you don’t get a reading, this means that the break within the wire is at a point between your two probes. Narrow the range between your probes till you get the exact point on the wire.
- If you got a reading after the initial check, what you do is simply expand the range between the two probes. You pick another point along the wire, poke it with the needle, and place your black probe on it to check for continuity.
Once you identify that a wire is bad, you could repair it at the point where there was a break. Ensure insulation by wrapping it with a rubber tape as without insulation, the wires may come into contact and cause other problems.
Regardless of this seemingly quick solution, the best solution is typically to completely change the whole electrical wire.
P.S: It is important to note that you could place any probe on any end of the wire and achieve the same results. The red probe doesn’t always have to be placed on a particular side of the wire when tracing or testing it.
Conclusion
When tracing or testing wires, all you need to do is simply check for continuity between two points. A multimeter is a handy and very accessible tool that could help you to achieve both of these within your car or walls.
It also helps in testing other electrical components and circuits, and you definitely want to have one by your side at all times.
Frequently Asked Questions
How Do You Trace A Wire With No Power?
To trace a dead wire, set your multitester to continuity, place one probe on the wire, and place the other probe on other wire endings. You do this till one ending produces a beep or low Ohm reading.
How Do I Trace A Single Electrical Wire?
To trace a single wire, place a multimeter probe at one end of the wire and place the other probe at multiple wire endings. The multitester produces a beep or low Ohm reading at the right wire ending.
How Do You Check Where A Wire Goes?
To check where a wire goes, you may refer to your home’s wiring blueprint or individually carry out a continuity check between the wire and other wire endings with the use of a multimeter.
How Do I Trace A Wire Behind Drywall?
To trace a wire behind drywall, you use an electronic stud finder and a voltage detector. A voltage detector particularly helps you identify exactly where live wires are.
How Do You Check Which Wire Is Which?
To identify wires, you refer to color codes or use your multitester to test against a grounded surface. If the wire gives a high voltage reading, it is hot and if the wire gives no reading, it is neutral.