
How To Test Starter With Multimeter
Of all the electrical components in your vehicle you never want to go bad, the starter sits amongst the most important ones.
This is because when a starter is faulty, you experience annoying issues like the car intermittently or completely failing to start, clicking or grinding noises from your starter, or even smoke coming from your engine.
These are symptoms that make the car almost useless, so you need to deal with the problem fast.
In our guide we explain step by step how to test starter with multimeter simply in just 8 steps.
Let’s get right in.
Tools Required To Test Starter
To diagnose your starter for issues, you need
- A multimeter
- Alligator clips for multimeter probes
- Car battery
- Jumper cables
- Swivel ratchet
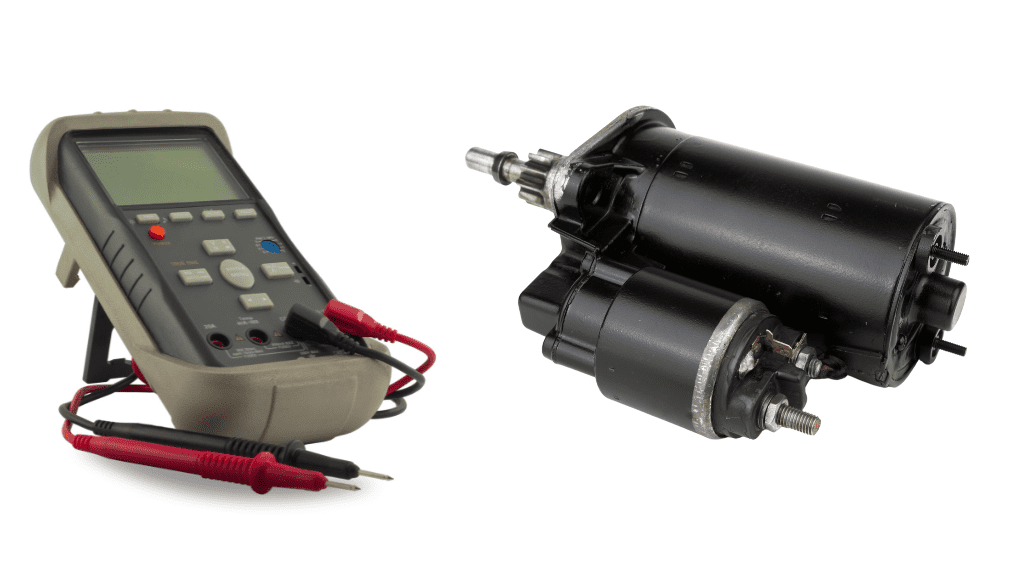
The multimeter and its probes are the most important tools you need to properly test your vehicle parts for issues. Now, to our main section.
How To Test Starter With Multimeter
Connect the positive multimeter lead to the high voltage input terminal on the starter solenoid and ground the negative lead on a metal surface using alligator clips. If your starter is good, the multimeter displays 12 volts and this value reduces when you try to start the vehicle.
All these will be explained further.
When testing your starter, there are two scenarios that you may have to work with.
The first involves testing the starter while it is still connected to the engine, and the second is testing the starter while it has been detached from the engine.
The second option is better if you desire comfort and safety against hazards while running your tests. If you don’t want to detach the starter from your vehicle, you may read steps 1 and 2, then skip to step 5.
- Apply Safety Measures
Before you can test your starter for issues, you need to get under the vehicle to have access to it. This comes with some hazards and you want to pay attention to these safety tips.
The first thing you want to do is to put your car in park mode and turn off the engine. You then place two bricks, stones, or fat chunks of wood behind your rear tires.
The second step is important because you use a car jack to raise the front side of your vehicle and you don’t want the car to move backward and fall while you’re under.
Shake the car as a check to ensure that it is sturdy and would not move when something slightly hits it.
- Locate The Starter
Although the location of a starter highly depends on the vehicle model, it is usually located where the engine and transmission meet.
This is where the flywheel is and the starter needs to engage directly with it to kick start the engine.
- Remove It From Under The Engine
Now, you take off the bolts used to fasten it to your vehicle’s engine. You use a ratchet for this, and your best bet here is a swivel ratchet as you don’t have enough room to fit in regular ratchets.
You then move to remove the wires connected to the terminals at the starter solenoid.
Hold the starter after removing the last bolt or wire so it doesn’t fall off, as it is heavy. Proceed to place it on a non-conductive surface for the next steps in the diagnosis process.
- Supply Power To The Starter
Using a 12-volt battery and jumper cables, you want to supply power to the starter to see if it works with the right amount of voltage.
These jumper cables go to the different battery terminals and you want to pay attention here.
For the jumper cable that you connect to the negative post of your battery, ground its other end on a metal surface. This surface could be a part of the starter apart from its terminals.
Moving to the jumper cable connected to the positive post of your battery, connect its other end to the high-voltage input terminal at the starter solenoid.
This is the outer terminal among the two from which you removed wires when detaching the starter from the car.
- Connect Your Multimeter Probes To Jumpers
Now, you connect your positive multimeter probe to the positive jumper cable (connected to the high-voltage terminal), and you connect the negative probe to the negative jumper cable (or any ground surface).
If you didn’t remove the starter from the engine, you simply connect your positive multimeter lead to the high-voltage solenoid terminal and the negative lead to any ground surface.
Alligator clips are great for fastening all the connections you make here.
- First Evaluation
At this point, you expect to get a reading from your multimeter. If your starter is in good condition, the meter presents you with a 12V reading (since you are testing with a 12V battery).
When you get this reading, it means your starter is receiving the appropriate power supply from the battery.
Anything other than 12V means your battery is bad (especially when you test it directly using jumper cables).
Alternatively (when you test it while it is still connected to the engine), it may also mean the wires running from your car battery are damaged.
Running a test on your 12V car battery helps you pinpoint the main issue. You may simply place the multimeter probes at their appropriate battery posts and check for your battery capacity on the meter screen.
If you don’t get 12 volts from the multimeter, then the battery is bad. If you got 12V but didn’t get 12V on the solenoid terminal, the wiring between the starter and car battery may be damaged.
On the other hand, proceed to the next steps if you got a 12V reading.
- Jump Start The Starter
Now, in the case that the starter has been detached from the vehicle, you want to mimic the engine getting started. You need a small jumper cable for this.
Connect one end of the jumper cable to your larger jumper cable (or high-voltage solenoid terminal), then touch the ignition tab with the other end of the cable. This tab is a protrusion usually located between the two solenoid terminals.
If your starter is still in your vehicle, simply ask a friend to turn the ignition key to “start”.
- Second Evaluation
The starter motor is expected to spin anytime you bridge the ignition tab to the solenoid terminal. If it doesn’t, then the ignition coil, motor windings, or the motor itself is bad.
The starter then needs to be replaced.
If it spins, however, the multimeter is also expected to show a value below 12V. This drop in value may go as low as 0.5V in some cases and means that the starter motor is drawing power from the high-input solenoid terminal.
Testing Starter Continuity and Resistance Using A Multimeter
The continuity test is an additional step you may take to identify what exactly is wrong with your starter.
In this test, you don’t need the battery or jumper cables, as it requires the absence of electric current.
Here you want to run two different diagnoses; a continuity test between the starter solenoid terminals and a resistance test between the low-input terminal and the motor windings.
Testing Continuity Between Solenoid Terminals
If your starter is in good condition, you don’t get continuity between your solenoid terminals.
Turn the multimeter dial to continuity mode or the Ohms setting and place the multimeter leads on each of the solenoid terminals. The meter is expected to display an “OL” reading, which indicates no continuity.
If you hear a beep sound or get an Ohms reading on your multimeter, the starter is bad and you need to replace it.
Additionally, you don’t expect continuity between the high-input solenoid terminal and the ignition tab if your starter is good. If there is continuity, then this explains an issue you may have with the starter still running after the vehicle is powered up.
Testing Resistance Between Low-Input Terminal And Motor Windings
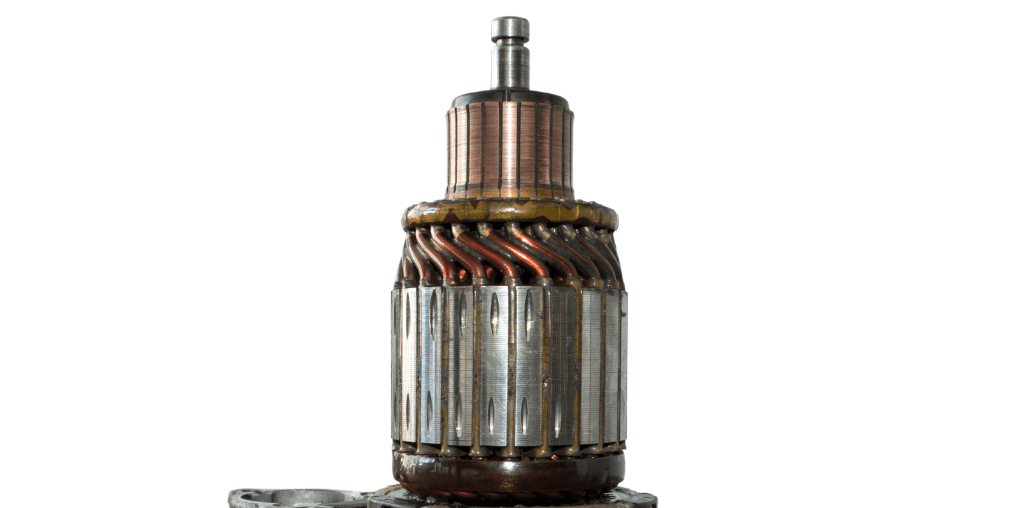
Now, you expect the low-input terminal to have continuity with the starter motor windings. The low input terminal is the inner solenoid terminal while the windings are copper wires located close to the starter motor.
However, with this test, you use only the Ohms setting and not the continuity mode. This is because you also want to check for a specific resistance value between these two electrical components.
Place the multimeter probes on the low-input tab and the motor windings.
If the starter is good, you expect the meter to display a value of about 0.1 Ohms. Having “OL” displayed means the starter is bad and needs to be exchanged.
Conclusion
Testing a starter for faults means you have to get involved with different diagnoses. You test for voltage input as well as continuity between the solenoid terminals and motor windings.
However, for safety, it is advised that you remove it from your vehicle before testing.
Frequently Asked Questions
How Many Ohms Should A Starter Read?
A good starter is expected to read about 0.1 ohms when testing resistance between the low-input solenoid terminal and the starter motor windings. A higher resistance hinders the starter’s performance.
How Many Volts Should A Starter Draw?
A starter is expected to draw the full voltage capacity of your car battery when testing between the high-input terminal and ground. If you use a 12V battery, a good starter is expected to draw 12V.

Author
Alex Klein is an electrical engineer with more than 15 years of expertise. He is the host of the Electro University YouTube channel, which has thousands of subscribers.