
How to test PCM with multimeter
When your car fails to start, you may think there is a problem with the ignition switch. When your car overheats, your mind goes to your cooling fan or other coolants as the potential culprits.
When your car fails to switch between gears automatically, you think there is a problem with your transmission system.
However, what if you are having all of these problems simultaneously? Then, your PCM might be the culprit, and you may need to have it replaced.
This article quickly sheds light on some of these issues you need to know and how you could use a multimeter to make a diagnosis.
Let’s get right in.
What is a PCM on a car?
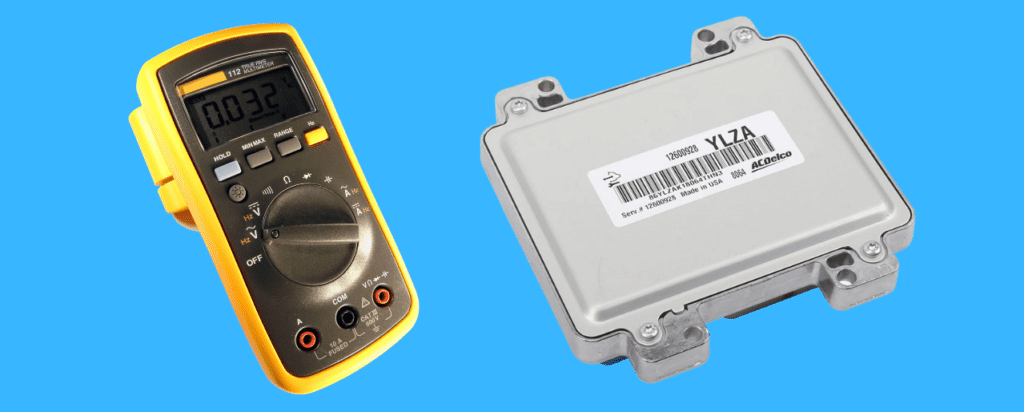
The Powertrain Control Module (PCM) is an electronic computer-powered unit that monitors and manages your vehicle’s powertrain — specifically, the components in your vehicle’s engine and transmission system.
The Powertrain Control Module (PCM) is different from the Engine Control Module (ECM) and the Transmission Control Module (TCM). Instead, a PCM combines these two computerized systems’ functions and manages every other part of your car that moves it forward.
These include your ABS braking, ignition timing, and your air/fuel ratio, among others.
To perform its core functions, the PCM gathers data from these different parts of your powertrain through component-specific sensors. For instance, the coolant sensor helps to monitor the temperature of your engine coolant and the PCM uses this data to control coolant pressure and temperature levels.
The O2 sensor helps to monitor the amount of oxygen/air in gas or liquid fuel and the PCM uses data from this to control fuel injection and air/fuel ratios.
Due to the core functions it performs within your car, you easily understand the gravity of having a bad PCM.

Common Symptoms Of A Faulty PCM
Many symptoms hint at a bad PCM, and this may be overwhelming. However, understanding when a PCM may be faulty isn’t as hard as you may think.
Remember that your PCM controls the smooth function of multiple components in your car all at the same time. This means many of these symptoms should be present at the same time. If you experience only one of these symptoms, then the fault may only be with the related vehicle component or sensor.
- Stalling or Jerking due to poor fuel injection
- Backfiring
- Heavy emissions and bad fuel economy
- Poor/erratic transmission or gear shifting
- Difficulty starting the car.
- Warning lights illuminated at the dashboard
If you only experience a symptom like poor transmission, the fault here could be that your transmission fluid is low, or your transmission valve body may be bad. If you have a problem starting your car, your ignition switch or starter solenoid may be faulty.
However, if you notice that your car is difficult to start, and when it does start, the car transmission also performs poorly, among other problems like excess emissions and jerking, all at the same time, then the PCM may be faulty. This is a hint that the PCM is not reading all the data it receives from the sensors well, or the PCM isn’t even working at all. In this case, you may then diagnose the PCM for problems.
Testing PCM with multimeter
You would need the following tools to diagnose your PCM for problems comprehensively.
- A Phillips screwdriver to loosen screws
- A flashlight so that you can see dark areas during inspection
- A multimeter
- Multimeter probes
- An OBD code scanner
- New PCM
- Electric rubber insulated gloves
- Safety Goggles
The most important tools here are the multimeter and the OBD scanner, which help you gather accurate test results. Once you have gathered these important tools, you may then proceed to preliminary steps in testing the PCM for issues.
Preparing for PCM Testing
Take Safety Precautions
Some activities bring you close to voltage while running a diagnosis on your PCM. This is why you need to take security precautions, which most importantly, involves wearing personal protective equipment like insulated rubber gloves and safety goggles.
Also, make sure that you follow every step in the PCM testing process to avoid making wrong connections. Wrong connections may trigger overcurrent and cause damage to your PCM, if it’s still good, or lead to dangerous sparks.
Locate the PCM in Your Vehicle
Your PCM’s location depends on your car’s manufacturer and model. However, generally, you should expect to find your PCM in the engine compartment, just under the hood on the passenger side of the car, or beneath the driver’s dashboard.
It is usually located close to the fuse box, so it should be easy to find your PCM if you know where it is. Nonetheless, it would be best to refer to your car manual to know where to find the PCM in your car.
Perform a Visual Inspection
Visual inspections are checks you do on motor components, wiring, and connections to search for surface-level problems quickly. When doing this, you need to pay attention to your wires. You check to see that your wires are not disconnected and are free from corrosion and rust.
You also check to see that there are no excessive rusts on the battery or PCM itself. Excessive corrosion on the PCM means you may have to replace the whole PCM with a new one.
Once these inspections are done, you may move to the main PCM diagnosis process. This is where the multimeter comes in.
How to Test PCM With Multimeter
First, use a multimeter to test that your car battery is properly charged and provides the right amount of voltage when the car is switched on and off. Use an OBD scanner to check for the P0601 code, or replace your PCM with a new one to see if problems persist.
Each of these steps will be explained in detail.
Test Your Vehicle Battery
The voltage supplied by your battery powers the PCM. Due to this, it is expected to fail if the voltage supply is insufficient — that is when the battery voltage is low.
Hence, you must test whether your voltage supply is sufficient before taking further steps. Moreover, finding that your voltage supply is the main issue saves you from a whole lot of stress.
To test your car battery, you follow these steps:
- Plug in Multimeter Probes
Insert the red multimeter probe into the “mAVΩ” port and the black probe into the “COM” port on the multimeter.
- Set the Multimeter to the 20VDC Range
The battery makes use of DC voltage to power vehicle components. Hence, you need to set the multimeter to the appropriate voltage range.
For max accuracy, you set the multimeter to the 20 VDC range, usually represented by a “V” with a line and three dots on its top. You can check our full multimeter symbol guide for clarity.
- Place the Multimeter Probes on the Battery Posts
Next, you place your red multimeter probe on your positive post and then place your black multimeter probe on your negative post.
- Test for 12 volts to 14 volts on Multimeter
At this stage, you need to test for two things — the voltage when the engine is switched off and the voltage when it is switched on. With the engine switched off, the multimeter should read around 12.6 volts, and with it switched on, the multimeter should read between 13.5 to 14.5 volts.
A reading of 11.9 volts or anything lower means your battery is dead and needs to be charged, or it is bad and needs replacement. In this case, your battery could be why your PCM may not function properly.
If you get good results from the multimeter, however, you can move to the next steps.
Use An OBD Code Scanner
Your car has in-built On-Board Diagnostics (OBD) that constantly monitors systems and components in your car. The OBD generates codes for diagnostic reports when a problem occurs, and each code generated represents a distinct problem.
Hence, OBD codes allow you to identify the source of faults in your car distinctively and, for us, whether your PCM is the source of these faults.
OBD scanners (OBD-II scanners) allow you to extract OBD diagnostic report codes. You simply plug the scanner into the OBD port and scan your car for OBD codes.
The location of the OBD port depends on the model of your car, but some common places to find it include beneath the car dashboard or close to the steering wheel. Refer to the diagram below to spot possible locations for OBD ports.
For your PCM, the OBD code you need to look out for specifically is the P0601 diagnostic code. The P0601 diagnostic code is reported to the OBD system by the PCM when it performs a self-check.
This self-check usually identifies an internal memory checksum error, which is typically present when the PCM is failing or has failed.
Another code related to the PCM is the P0690 code. The P0690 OBD code represents a problem with the PCM relay, which is a device that regulates the power supply to the PCM.
When there is a problem with the PCM relay, there may be a reduced power or overcurrent supply to the PCM, making it perform poorly.
A PCM failure with either the P0601 or P0690 code can also be caused by a low voltage supply from the battery, so testing the battery prior is important.
So what happens if you don’t get a P0601 or P0690 code, but you get other codes from the OBD scanner? You can refer to the diagram below to know exactly how to interpret OBD codes and pinpoint issues.
From the above, you see that, for instance, if you get a P03 code, the problem is with your ignition system.
Perform Voltage Test on PCM Power and Ground Pins
The final step for testing whether your PCM is faulty is to examine the different wires that connect it to the different sensors. Although a visual inspection is great here, the multimeter makes inspection easier and can offer you more accurate results. With the multimeter, you perform a voltage test.
A voltage drop test allows you to measure the voltage between your battery and PCM terminals to identify any resistance or short. With the following tests, you idle your car without switching on the engine and turn on as many accessories as possible.
Ground Voltage Test
For ground measurements, refer to your PCM manual to identify its power ground terminal and back probe this terminal with a pin. Next, put your multimeter in the 2VDC range, place your black multimeter probe on the negative post of your battery, and place your positive multimeter probe on the back probe pin at the PCM ground terminal.
A reading of more than 0.1V, especially when this reading reaches as high as 0.3V, tells you there’s a short between your PCM and the battery, possibly due to corrosion. This may be why your PCM may not be working properly.
If you don’t find any problems here, you then perform a voltage drop test on the power terminal.
Power Voltage Drop Test
Use your PCM manual to locate the power terminal and backprobe this terminal. Place your black multimeter probe on the positive battery post and place your red multimeter probe on the backprobe pin at the power terminal.
Here, you aren’t meant to see a voltage of more than 0.5V. If you see a high voltage reading, then there is a short between your PCM and the battery that may be due to corrosion, and your PCM may not be working properly.
If you don’t find any problem here, then your PCM may not be faulty after all, and you may need to diagnose another device or component in your car.
Use New PCM
This final PCM test is where you replace your PCM and check if any problems you were experiencing persist. This is an expensive test, so you must ensure that all previous tests have been tried and there are strong suspicions that the PCM is the culprit.
If the problems persist after changing your PCM, the fault comes from another part of your car.
Frequently Asked questions
How many volts should a PCM have?
For its power supply input, the PCM uses the same voltage as your battery, which is between 12V and 14V. The PCM uses a 5V reference signal between other components in the circuit.
Can you bench test a PCM?
There is no way to bench test a PCM; it only provides diagnosis information when hooked to a power source (battery). You can then use an OBD scanner to get codes or perform a voltage drop test.
Does the PCM have a relay?
Yes, the PCM has a relay regulating the power supplied. The PCM also works with relays on other components, such as the cooling fan, coolant, and transmission control relays.

Author
Alex Klein is an electrical engineer with more than 15 years of expertise. He is the host of the Electro University YouTube channel, which has thousands of subscribers.