
HOW TO TEST O2 SENSOR WITH MULTIMETER
Without having to explain why, your car engine is fragile and probably the most important component in your vehicle.
There are a lot of sensors that make it run at its most optimal condition and when one of these is bad, the engine is in danger.
Are you having problems with your engine?
Have you run tests on the more popular sensors like the crankshaft sensor or throttle position sensor and still have the same problem?
Then the O2 sensor may be the less popular culprit.
In this post, we’ll walk you through the whole process of checking O2 sensors, from understanding what they are to using a multimeter to make a variety of diagnoses.
Let’s get right in.
What Is An O2 Sensor?
The O2 sensor, or oxygen sensor, is an electronic device that measures the amount of oxygen in the air or liquid around it.
When it comes to vehicles, the oxygen sensor is a device that assists the engine in regulating its air and fuel ratio.
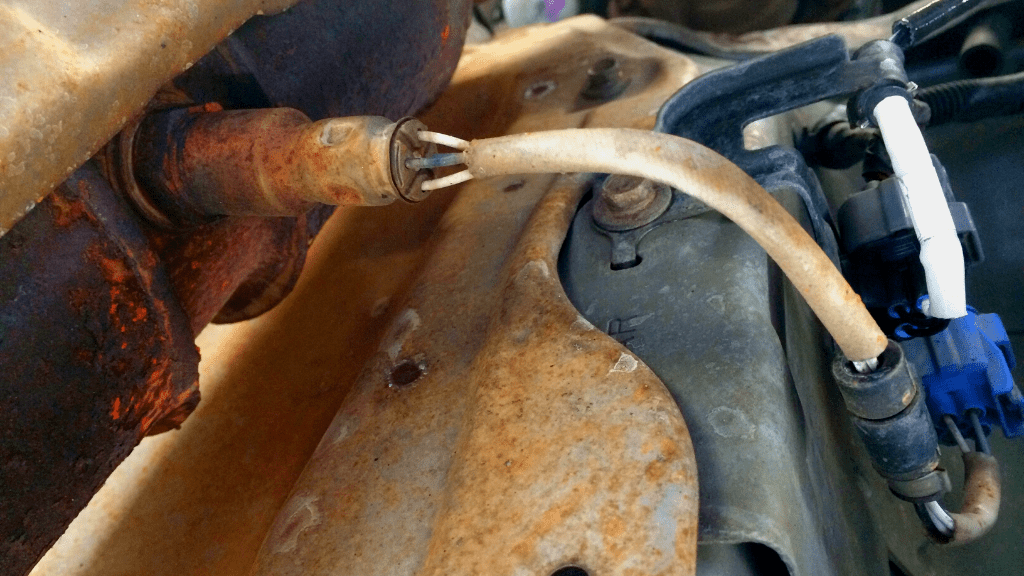
It is found in two locations; either between the exhaust manifold and catalytic converter, or between the catalytic converter and exhaust outlet.
The most common type of O2 sensor found in cars is the Wideband Zirconia sensor, which has four wires connected to it.
These wires include one signal output wire, one ground wire, and two heater wires (of the same color).
The signal wire is the most important for our diagnosis and, if your oxygen sensor is bad, you expect your engine to suffer and show certain symptoms.
Symptoms of Bad O2 Sensor
Some of the symptoms of a bad O2 sensor include
- Illuminated check engine light at the dashboard,
- Rough engine idling,
- Bad smell from engine or exhaust pipe,
- Jumping engine or power surges,
- Poor fuel efficiency, and
- Bad vehicle mileage, among others.
Leaving your O2 sensor unreplaced when it has a problem leaves you exposed to even more vehicle costs that could enter thousands of dollars or your local currency.
How do you test for issues with the O2 sensor?
An excellent tool for troubleshooting electrical components is a digital voltmeter, which you need.
How To Test O2 Sensor With Multimeter
Set the multimeter to the 1-volt range, back probe the O2 sensor’s signal wire with a pin, and warm up your car for about five minutes. Connect your positive multimeter probe to the back probe pin, ground your black probe to any metal surface nearby, and check the multimeter for reading between 100mV to 1000mV.
There are a lot of additional steps involved, so we will proceed to explain all the steps in detail.
- Take Preemptive Steps
Preemptive steps here help you to avoid the subsequent rigorous tests you have to carry out on the O2 sensor to find a problem with it.
Firstly, you visually examine the wires to see if they are damaged or contaminated.
If you don’t find a problem with them, you proceed to use a scan tool, like an OBD scanner, to retrieve error codes.
Error codes like P0135 and P0136, or any other code signaling an issue with your oxygen scanner, mean you don’t have to carry out further tests on it.
Nonetheless, the multimeter tests are more in-depth, so you may still need to carry out further tests.
- Set The Multimeter To The 1-Volt Range
Oxygen sensors work with millivolts, which is a pretty low voltage measurement.
To carry out an accurate test on the oxygen sensor, you then need to set your multimeter to the lowest DC voltage range; the 1-volt range.
The readings you get alternate between 100 millivolts to 1000 millivolts, which represent 0.1 volt to 1 volt respectively.
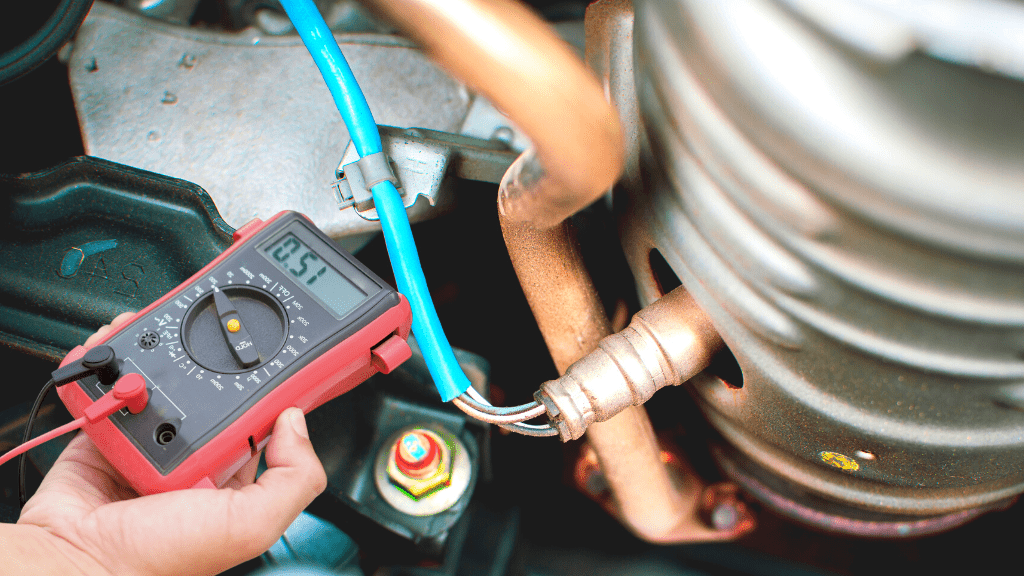
- Back Probe The O2 sensor’s Signal Wire
You need to test the O2 sensor while its connector wires are attached.
Inserting your multimeter probe in the connector slot is difficult, so you need to back probe it with a pin.
Simply insert a pin into the output signal wire terminal (where the sensor wire plugs into).
- Place The Multimeter Probe On The Back probe Pin
Now, you connect the red (positive) multimeter probe to the back probe pin, preferably using an alligator clip.
You then ground the black (negative) probe to any metal surface close by (your car chassis, for instance).

- Warm Up Your Car
For O2 sensors to work accurately, they need to operate within a temperature of about 600 degrees Fahrenheit (600°F).
This means you have to start and warm up your car engine for about five (5) to 20 minutes, till your car reaches this temperature.
Be careful when the car is this hot, as you don’t want to burn yourself.
- Evaluate Results
Once you have placed the probes in the right positions, it’s time to check the multimeter for readings.
With your oxygen sensor warmed up, the digital multimeter is expected to give a reading that is rapidly fluctuating between 0.1 volts to 1 volt if the sensor is good.
If the reading stays stagnant at a particular value (commonly about 450mV/0.45V), then the sensor is bad and needs to be changed.
Going further, a reading that constantly stays lean (below 350mV/0.35V) means that there is a low fuel mixture compared to the air intake, while a reading that constantly stays high (above 550mV/0.55V) means there is a lot of fuel mixture in the engine and lower air intake.
A low reading may also be caused by a faulty spark plug or leaking exhaust, while a high reading may additionally be caused by factors like
- The O2 sensor having a loose ground connection
- The EGR valve stuck open
- A spark plug that is in very close proximity to the O2 sensor
- O2 sensor wire contamination due to silicon poisoning
Now, there are further tests to measure whether the O2 sensor is functioning properly or not.
These tests are on the response to a lean mixture or high mixture, and help us diagnose whether the sensor works as it should.
Testing O2 Sensor Response To Lean Mixture
As mentioned earlier, a lean mixture naturally makes the oxygen sensor produce a low voltage reading.
With the sensor still fluctuating between 0.1V to 1V, unplug the vacuum hose from the positive crankcase ventilation (PCV).
Now, the multimeter is expected to produce a low value between 0.2V to 0.3V.
If it doesn’t constantly stay between these low readings, then the sensor is bad and needs to be changed.
Testing O2 Sensor Response To Rich Mixture
With the high mixture test, you want to leave the vacuum hose plugged into the PCV and, instead, unplug the plastic hose going into the air cleaner assembly.
Block the hose slot at the air cleaner assembly so that air doesn’t go into the engine.
Once this is done, the multimeter value is expected to display a constant reading of about 0.8V.
If it doesn’t display a constant high value, then the sensor is bad and you need to replace it.
You may additionally run a rest on your O2 sensor heater wires with the use of a multimeter.
O2 Sensor Test Through Heater Wires
Turn the multimeter dial to the Ohmmeter setting and back probe the O2 sensor heater wire and ground wire terminals.
Now, connect the positive multimeter lead to one of your heater wire back probe pins and connect the negative lead to the ground wire back probe pin.
If the oxygen sensor circuit is good, you get a reading between 10 Ohms and 20 Ohms.
If your reading does not fall within this range, the O2 sensor is bad and needs to be replaced.
Conclusion
Testing your O2 sensor for damage is a procedure that involves multiple testing stages and methods. Be sure to go through all of them for your test to be comprehensive, or refer to a mechanic if they become too difficult.
Frequently Asked Questions
How Many Ohms Should An Oxygen Sensor Read?
An oxygen sensor is expected to read between 5 Ohms and 20 Ohms, depending on its model. This is obtained when you test the heater wires with the ground wires for damage.
What Is The Normal Voltage Range For Most O2 Sensors?
The normal voltage range for a good O2 sensor is a rapidly changing value between 100 millivolts and 1000 millivolts. These convert to 0.1 volts and 1 Volt respectively.

Author
Alex Klein is an electrical engineer with more than 15 years of expertise. He is the host of the Electro University YouTube channel, which has thousands of subscribers.