
How To Test A Subwoofer With A Multimeter
A powered subwoofer is one of the essential elements of a full audio system, regardless of whether your setup is for movies, music, games, or all of the above.
People usually tend to upgrade their music systems with subwoofers to enhance the low-end frequencies that regular speakers cannot produce.
A problem with the subwoofer might have a negative impact on the sound quality. In such a situation, the best option is to test your subwoofer with a multimeter.
This guide will help you learn how to test a subwoofer with a multimeter in just a few easy steps.
Let’s get right in!
How Does a Subwoofer Work
A subwoofer is integral to any sound system since it is a loudspeaker made specifically to produce low-frequency audio. Although most subwoofers are powered, some are passive and need to connect with an amplifier to function.
The subwoofers send the sound waves to the woofers in the music system, which results in the bass frequencies that are heard. Subwoofers are usually best for car audio systems or home theatres. Not all subwoofers have built-in amplifiers. You might have to use an external amplifier for functionality in some of them.
How To Tell If a Subwoofer Is Bad
There are many symptoms that indicate whether your subwoofer is faulty or not. These range from lack of bass and distortion, to hearing scratching sounds.
The cone of a bad subwoofer might not move at all. It might also be extra wobbly, which may indicate that it is damaged, or not in its best condition.
The best approach to ensure your subwoofer is functioning properly, is to test it with a multimeter. A multimeter can measure impedance, check for blown coil, and measure continuity.
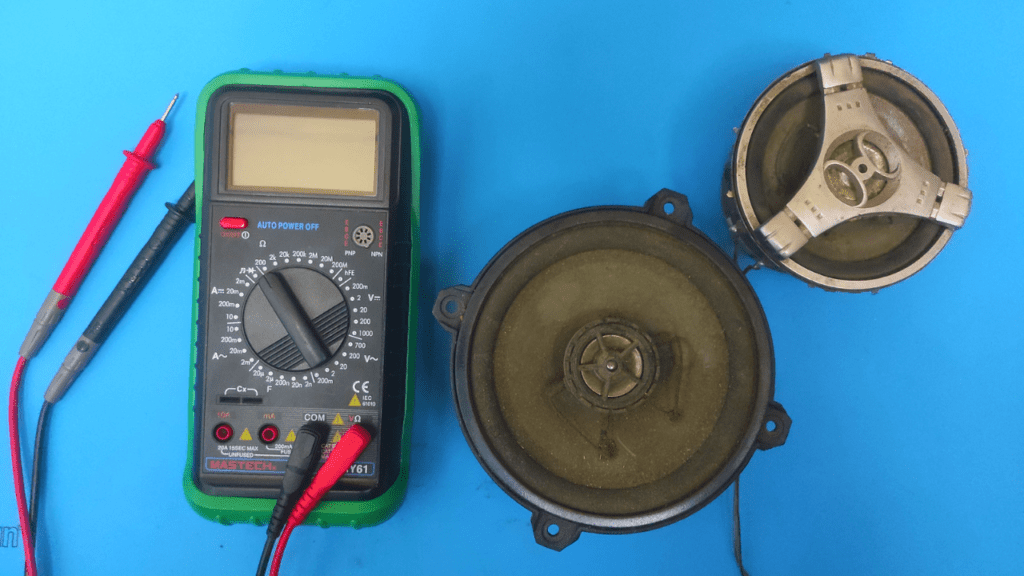
How to Test a Subwoofer with a Multimeter
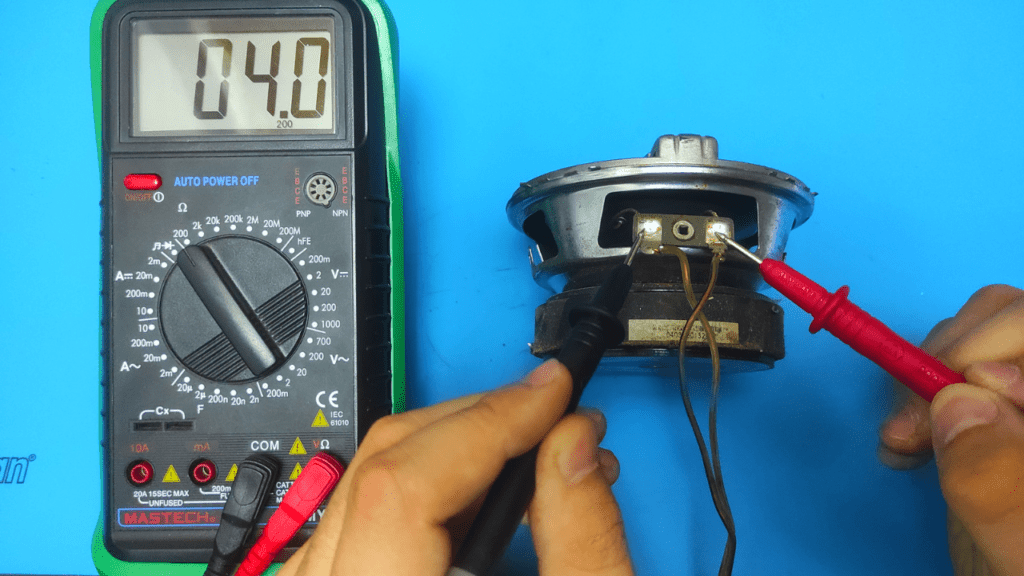
Connect the multimeter’s probes to the positive and negative terminal of the subwoofer’s voice coil after setting it to the ohms setting, specifically in the 200 Ohms range. It is good if you get a reading between 1 and 4, if it shows no resistance, the subwoofer is probably blown.
We will go into each step and every other important step in detail.
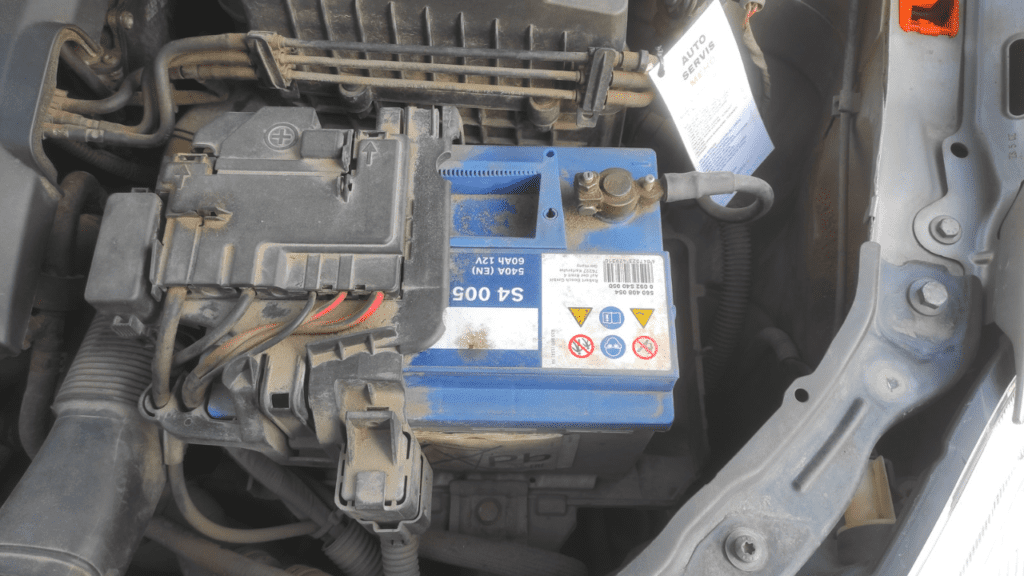
- Disconnect the Subwoofer from Its Power Source
First, you must take your necessary materials and unplug the subwoofer from its power supply. This procedure may be as easy as removing the subwoofer from its external amplifier, or removing the subwoofer from your car battery, depending on whether it is an active or passive subwoofer.
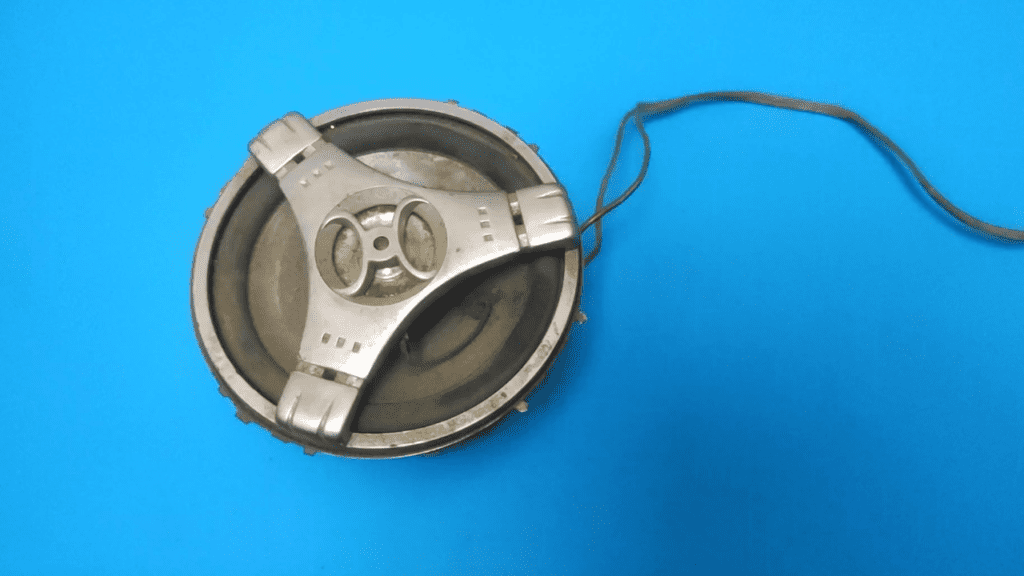
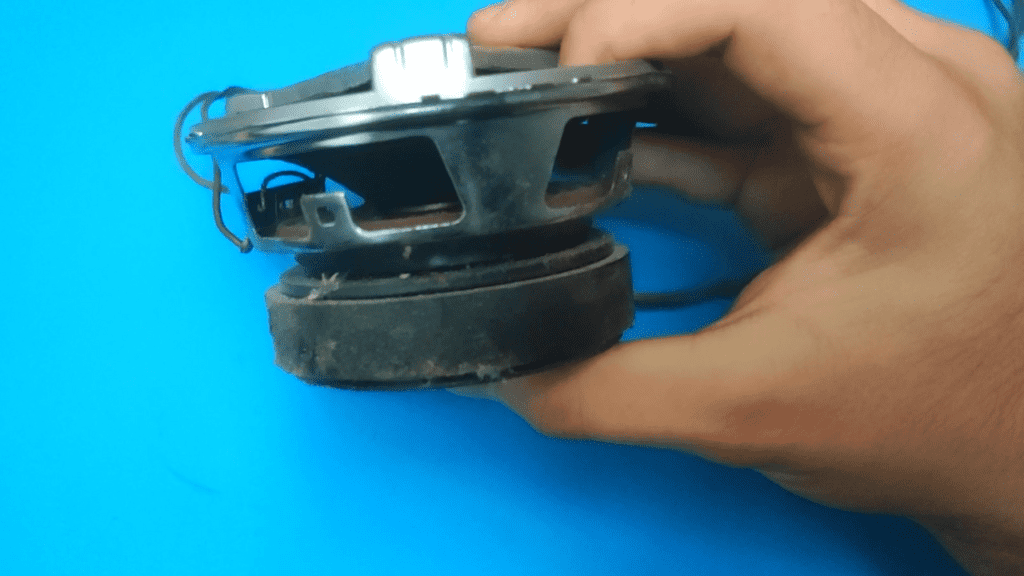
- Remove the Subwoofer from its Housing
You can securely remove the subwoofer from the car once it has been unplugged from the power source. However, depending on the subwoofer’s design, you might need to remove the cone out of the enclosure to get to the wire coil.

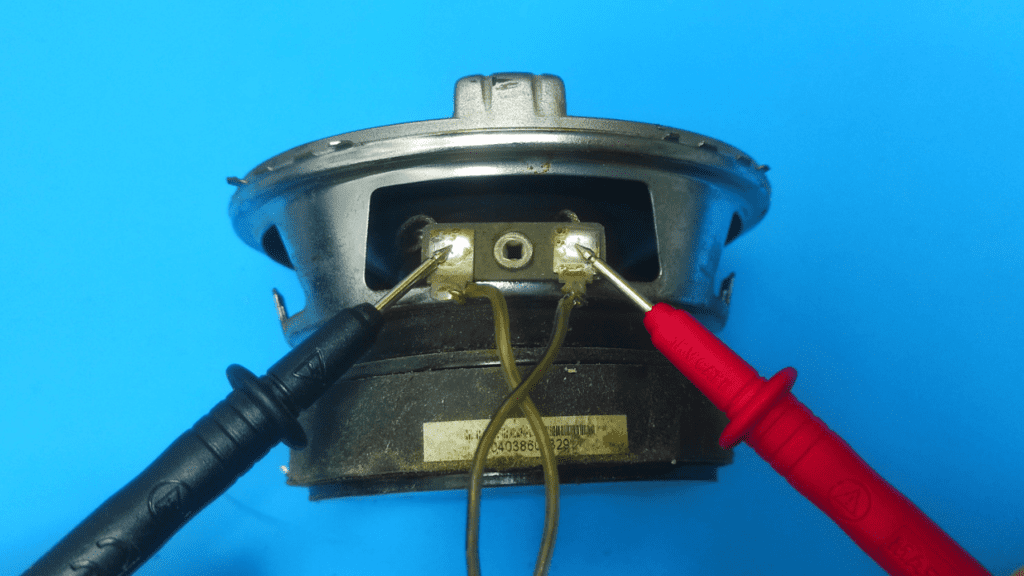
- Put Multimeter Probes into The Voice Coil Terminal
After removing it from its enclosure, the multimeter probes need to be inserted into the wire coil input terminal of the subwoofer cone. These are red and black, matching the red and black probes on the multimeter.
Connect the multimeter probes to the subwoofer speaker’s correspondingly colored terminal. Make sure they are completely inserted before turning on the multimeter.
- Set The Multimeter’s Resistance in Ohms
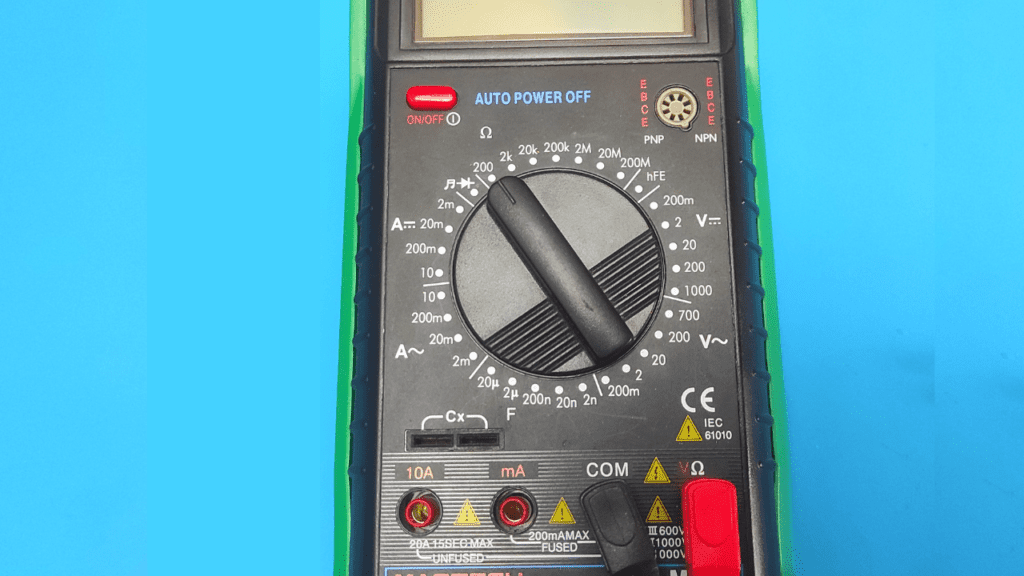
You must measure the subwoofer’s resistance to check for problems. You should turn the multimeter’s dial in the Ohms position to measure resistance. Turn on the power and change the multimeter’s front-dial setting to ohms. On the digital display screen, a reading ought to appear right away.
On the multimeter, the Ohms setting is denoted by the Omega Symbol (Ω), which, as you will see, also has several ranges (2MΩ, 200Ω, 2kΩ, 20kΩ, and 200kΩ).
You should turn the multimeter to the 200 Ohm limit because it is the closest higher range that produces the most precise results. Place the positive and negative leads next to one another to see if the multimeter is correctly set.
If everything is set up correctly, the multimeter will beep in continuity mode or display a value very close to zero or zero when the Ohms setting is used. Move on to the following stage if you receive these.
- Evaluate Results
Depending on your subwoofer, the multimeter should provide a reading between 1 and 4. If it doesn’t indicate any resistance, the subwoofer is probably blown, and if the multimeter shows a lower reading, it should be discarded. Additionally, the voice coil may be blown if the work drifts excessively frequently.
Video Guide
You can also check our video guide:
Test A Subwoofer Without an Amplifier
The voice your subwoofer produces is a simple way to test it. Having an amp for that is quite helpful in figuring out what’s wrong with your subwoofer. With an amp, you can hear a blown-out subwoofer’s defects and distortion. However, you can test your subwoofer without an amp if you want to be more precise and thorough or don’t have one.
There is a method you may use if you want to test your subwoofer without using the amp. You will need a 9V battery, a tester or multimeter, and a wire to do so. A wire, a tester or multimeter, and a 9V battery are required.
Connect the subwoofer and the battery by taking the wire and connecting the coil’s positive terminal to the positive end of the 9 volts battery. It would be best if you did the same on the opposing ends.
Once the battery has been connected correctly, determine whether or not the woofer’s cone is rising. As soon as you attach the battery, your subwoofer should start to rise if it functions properly. And it ought to decrease after you unplug. You must presume that the subwoofer is already blown out if it doesn’t move.
If so, check if the subwoofer is blown out with a tester or multimeter. You can do that by using the previous technique for determining the subwoofer’s resistance. Your woofer is blown out if the reading is anything other than 1 ohm or higher.
This is an excellent technique to determine whether your subwoofer has to be repaired because it is blown out or if there are other problems.
Can You Fix a Blown Subwoofer
You may be able to repair your blown subwoofer yourself in some circumstances. If your voice coil is stuck, search for a flashlight or a comparable round object and use it to force the coil back into place. Then, see if it functions.
You could patch a tear with speaker dust cap adhesive and a paper towel. Use the glue to seal the hole in the towel after applying it. The paper towel needs to be smooth for a seamless patch job.
If your foam surround is broken, you can fix it by removing the gasket from the frame and cutting the harmed portion off the sub. After removing the residue with rubbing alcohol, attach the new foam surround. Place the new foam surround and give the adhesive some time to dry. Reinstall the gasket lastly.
Conclusion
Testing subwoofers with the use of a multimeter for faults such as lack of bass or distortion is one of the easiest diagnosis procedures, considering you’re doing it the right way.
Make sure you set the multimeter to the appropriate range to get the right results.
FAQs
How Do You Know if Your Subwoofer Is Burnt Out?
You can tell if a subwoofer has blown, if there is no sound at all, if the music is distorted or scratchy, if there is no movement in the cone, or if there are popping and crackling voice.
What Causes a Subwoofer to Stop Working?
The most common cause of subwoofer damage is too much power. The amp pushes the sub’s capabilities when it supplies too much power and unbearable pressure is produced.

Author
Alex Klein is an electrical engineer with more than 15 years of expertise. He is the host of the Electro University YouTube channel, which has thousands of subscribers.